Blog
Recent Posts
CANFDuino: Upgrading the Hardware to 24 VDC Power Supply
Posted by on

Today, we are addressing a frequently asked question since the product's launch: 'Is it possible to power CANFDuino off of 12 or 24 V power?'. Our previous response, 'Yes, using the prototyping space to add a regulator', while accurate, may not have been as helpful as we intended. To provide a more practical solution, we have prepared a straightforward, step-by-step guide that will walk you through the modification needed to power the CANFDuino off of 12-24 V without relying on the USB connection as the primary power source.
A voltage regulator, a key component in our CANFDuino modification, is a device that maintains a constant voltage level. It does this by adjusting the current flow in the circuit in response to changes in voltage, and in simple terms, can be thought of as a 'voltage converter.' Voltage regulators can be either linear or switching devices, where switching devices are typically more efficient but may require more components, and linear devices are simpler but less efficient, as they require efficient heat dissipation when running under heavy load.
To simplify things, we will utilize a linear regulator to convert our 12-24 V input into a steady 5 V power source for our CANFDuino. We have chosen the LM7805 regulator for this task due to its long-standing reliability, affordability, and availability in various packaging options.
Note: The following modification worked for us based on our specific parts and setup. Your setup may differ, so there is a risk of failure, including potentially damaging the processor, when making any modifications.
Step 1: Design Circuit
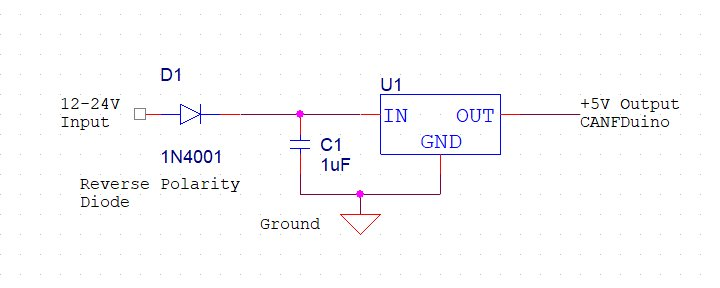
The LM7805 regulator typically requires only 1-2 additional components. These are usually input and output capacitors, stabilizing the incoming voltage and reducing any high-frequency interference that could affect the semiconductors relying on the 5V power supply.

The diagram above displays the circuit to be integrated into the CANFDuino. It includes a regulator, an input capacitor, and a blocking diode. The blocking diode is crucial as it safeguards the board from damage caused by reverse polarity. It prevents any harm from occurring if the black and red wires are unintentionally switched. We have all made this mistake at some point, so it's valuable information to include. We have decided not to include an output capacitor since the CANFDuino already has one on the 5V input side of the built-in 3.3V regulator.
Step 2: Buy & Build
Let's begin with a simple step: Visit Mouser and select the components that suit your needs and comfortably fit into your prototyping space. The CANFDuino supports SMT and through-hole components, so we used a combination of both for this circuit, as these components were available.
When soldering parts onto the CANFDuino, it's important to be careful. Do not solder the regulator output to the 5 V area of the CANFDuino until you have built and tested the circuit. It's best to build and test the circuit separately from the rest of the CANFDuino to avoid any damage. Once the circuit works properly, you can connect to the CANFDuino’s 5 V area. This is recommended for all modifications.

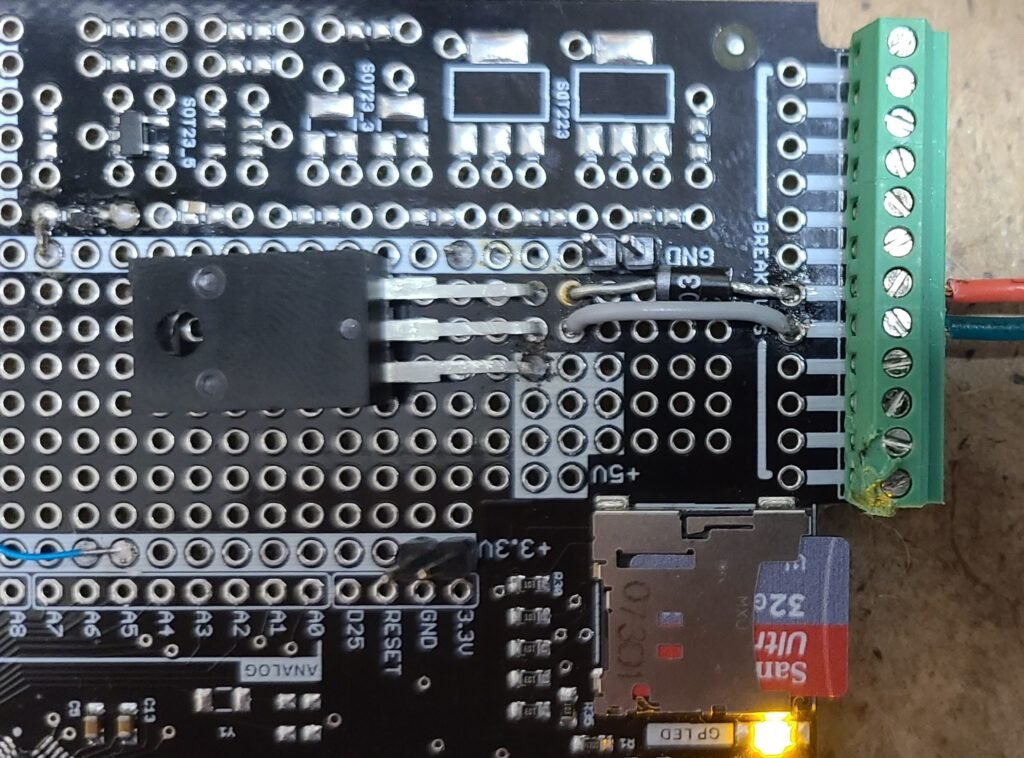
The image above shows our fully assembled mod after testing and connecting to a 5V power source. In the photo, we use breakout connections to the terminal blocks for easier wiring to our 12-24V input (red for positive input, green for negative input). Additionally, you'll notice a small capacitor on the SMT pads with wires running underneath. We've also flipped the regulator for easier mounting and soldering, which changes the orientation of the input and output pins from the diagram.
Step 3: Test Circuit
After soldering all components in place and making the power connections to the terminal block, it’s time to test. Here's how: Connect your 12-24 V source to the terminal block wiring. Then, using a DMM, check the output terminal pin; it should read 5 V. If you have good output from the regulator, power down the circuit and solder it to the 5 V area. If you do not measure 5 V, review your circuit design, regulator pinout, and components, and check the integrity of your solder connections. Once corrected, try the test again until you succeed.
Step 4: Wire and Power On

After soldering the regulator output to the 5V section, remove the boot jumper (if installed) and switch on the 12-24V power. You should notice the orange GPLED blinking, indicating the bootloader is entered. Now, you can power your CANFDuino permanently from the 12V input and connect USB whenever necessary to program the unit or monitor bus traffic. Additionally, you can combine this modification with our Bluetooth upgrade to keep the CANFDuino connected to a vehicle and establish a wireless connection.
CANFDuino - Dual CAN/CANFD Prototyping Platform
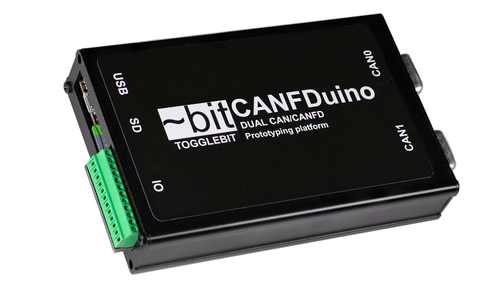
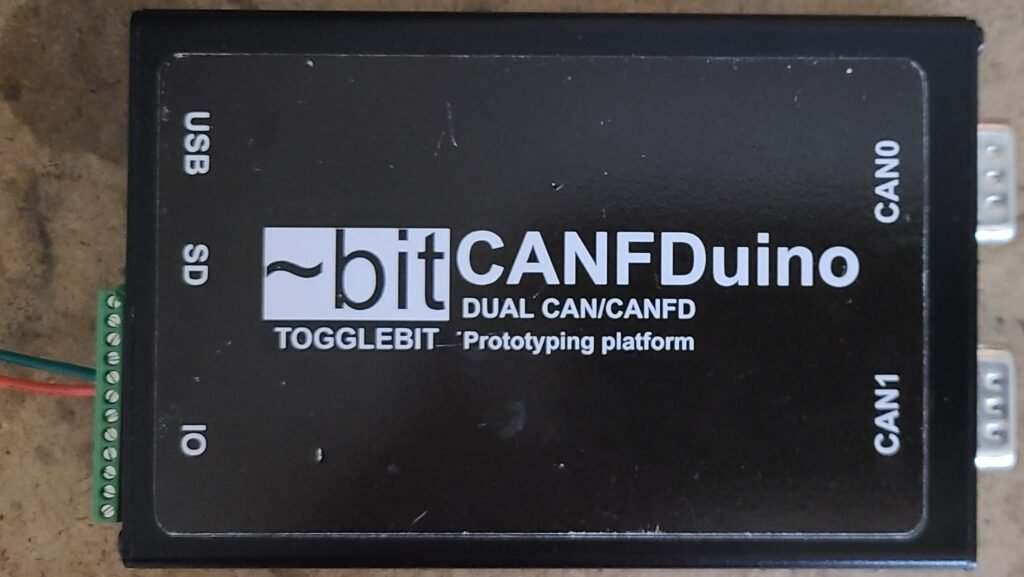
The CANFDuino is a fully-equipped embedded system designed for real-world applications. It integrates essential features such as dual CAN/CANFD ports, an SD card slot, and numerous analog and digital I/O. In addition, it includes an onboard prototyping shield for SMT and through-hole components, a sturdy aluminum enclosure, and durable connectors.
The CANFDuino supports CANFD, the latest version of the CAN Bus standard, which accommodates speeds of up to 5 Mbps. It has two native ports with DB9 connectors in an enclosure, ready to be mounted on your vehicle or installed in your autonomous project. This platform suits tinkerers, hackers, and industry professionals seeking an off-the-shelf, open-source CAN Bus solution that requires minimal or no hardware assembly.
Industrial Ethernet Evaluation Board Supports Ethernet/IP, EtherCAT, Profinet, Profibus, Modbus, And More
Renesas announced their RX72M networking solutions, which reduce the development efforts while using the RX72M for slave equipment for industrial networks; they are available for motor drives at robot terminals, small programmable logic controllers (PLCs) and remote I/O, and more.The RX72M solution comprises of an evaluation board with operating system, middleware, and sample software supporting around [...]
IoT (Internet of Things) Development Board For Designing Secure, Google-Cloud-Connected Systems
Microchip Technology announced their AVR-IoT WG Development Board, an Internet of Things (IoT) rapid prototyping system, which is part of an expanded partnership with Google Cloud, thus letting designers to prototype connected devices. The solution links an AVR microcontroller (MCU), a CryptoAuthentication secure element IC and a fully certified Wi-Fi network controller to provide a way to [...]
CAN Bus Prototyping With Arduino Uno - Prototyping Hardware
This post is part of a series about Controller Area Network (CAN Bus) Prototyping With the Arduino Uno. As I had mentioned earlier, it is assumed that you have some basic knowledge of the Arduino, Arduino Sketches, and Arduino Shields. I will nevertheless take the opportunity of mentioning the prototyping hardware and its variants. It is important to know that the [...]
Rapid IoT Prototyping Kit With BLE And Zigbee Connectivity
The Rapid IoT Prototyping Kit by NXP Semiconductors was designed to take developers from an Internet of Things (IoT) idea to Proof of Concept (PoC) in a matter of minutes. The Rapid IoT Prototyping Kit operates with the powerful Kinetis K64F Core 32-bit Microcontroller for application processing and features a Kinetis KW41Z Wireless Controller for Bluetooth® Low Energy (BLE), Thread, [...]
Electronic Control Unit (ECU) With Five CAN Bus Ports Plus Ethernet, Flexray, And LIN Bus Interfaces
Expinovo (Germany) has developed an ECU (electronic control unit) with multiple interfaces used in in-vehicle networks, including five CAN Bus ports. The CatchTheBus® device supports the CAN FD protocols (four of the five CAN interfaces). The programmable ECU by Expinovo also provides interfaces for Ethernet, Flexray, LIN (two ports), and EIA-232 (two ports). Additionally, the product features four [...]
Guide To Full-Fledged Electronic Prototyping Using The Arduino Platform
In just 24 sessions of one hour or less, Sams Teach Yourself Arduino Programming in 24 Hours teaches you C programming using the Arduino, so you can start creating inspired “DIY” hardware projects of your own! Using this book’s straightforward, step-by-step approach, you will walk through everything from setting up your programming environment to mastering C syntax [...]
Microchip Prototyping Boards For 32-Bit Applications
Two prototyping boards for 32-bit applications are now available from Microchip Technology Inc., a provider of micro-controller, mixed-signal, analog and Flash-IP solutions. The PIC32MX and PIC32MZ Curiosity Boards include an integrated programmer debugger and are fully integrated with Microchip’s MPLAB® X IDE and into PIC32’s powerful software framework, MPLAB® Harmony that provides flexible and modular interface to application [...]
Arduino For Dummies: Work Through Sketches Line By Line In Plain English
Arduino is an open-source computer hardware and software company, project and user community that designs and manufactures microcontroller-based kits for building digital devices and interactive objects that can sense and control objects in the physical world.This is no ordinary circuit board. Arduino allows anyone, whether you're an artist, designer, programmer or hobbyist, to learn about [...]
Controller Area Network (CAN Bus) Development And Prototyping with Raspberry Pi
The prototyping of Controller Area Network (CAN) applications used to be a tedious and expensive task, but the recent years have seen the emergence of low-cost, yet easy-to-use embedded development platforms such as the Raspberry Pi. The Raspberry Pi is a low cost, credit-card sized computer that plugs into a computer monitor or TV, and uses a standard [...]
 Loading... Please wait...

