 Loading... Please wait...
Recent Posts
SAE J1939 Turbo Interface for Raspberry Pi - Firmware Update
Posted by on
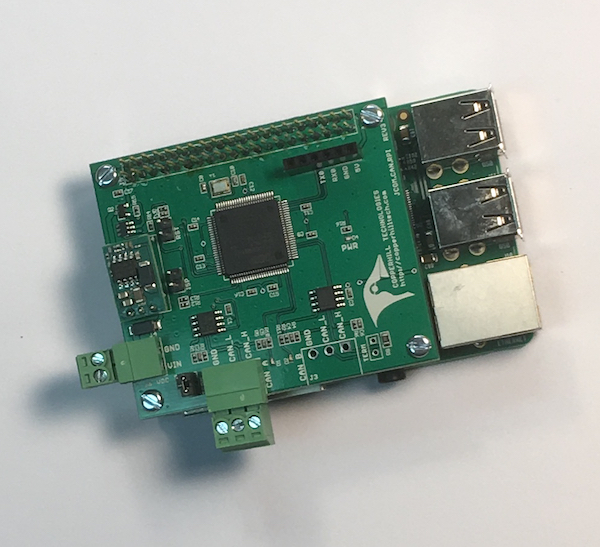 The jCOM.J1939.RPi, an SAE J1939 interface for the Raspberry Pi, is not an RPi HAT in the common sense. The board incorporates an ARM processor with CAN transceiver for use on the Raspberry Pi while allowing the operation with any other RPi-compatible board.
By combining our J1939 port interface, the Raspberry Pi, an SAE J1939 cable, and open-source software libraries, you are ready to go with a powerful turn-key RPi-based J1939 bus solution.
The board supports the full SAE J1939 protocol according to J1939/81 Network Management (Address Claiming) and J1939/21 Transport Protocol (TP). It also supports a serial protocol (per serial COM port) to maintain communication with the Raspberry Pi. This protocol is being extended on occasion, either due to customer request or to add new features we deem beneficial for our customers.
Note: The firmware can be updated per means of a UART-to-USB breakout board, which you need to purchase. Please contact us and we will provide you a code that will apply a 30% discount on the purchasing price.
In order to update the firmware, please follow the steps as described here:
1. Check the Firmware Version Number
In order to check the current firmware version number, you need to install and compile our "C" demo program as described in our post "C" Programming The SAE J1939 Turbo Interface for Raspberry Pi (Don't worry, this is a fairly easy procedure). Run the program by typing:
./jCOM1939
Type 'h' for help:

Type 'v' to obtain the hardware and software version:
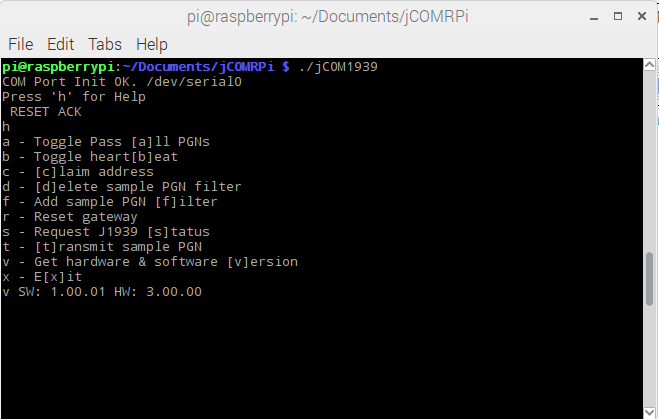
The screen shot above shows the software (firmware) version 1.00.01, which is the initial release version. The current firmware version, including a brief description of the new functionality, can be found at the bottom of the jCOM.J1939.RPi product page.
2. Download the Firmware File
In order to update the internal program (i.e. the firmware), we provide a .hex file that can be loaded into the device per means of a UART-to-USB breakout board.
To check the different firmware version, please refer to the jCOM.J1939.RPi product page.
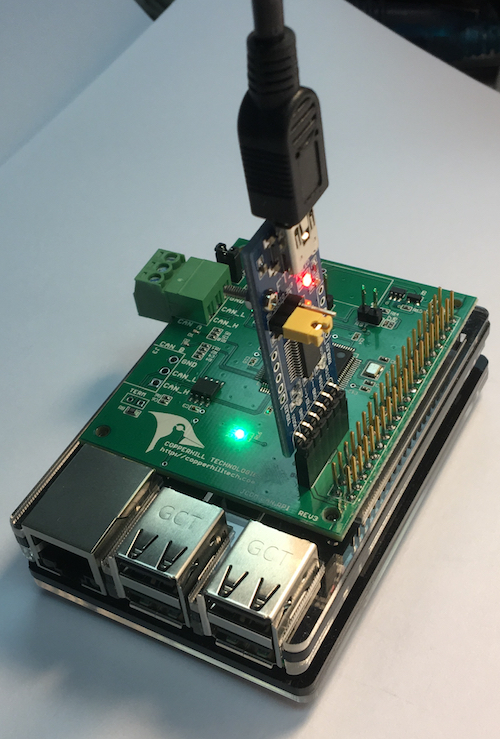
3. Install the Breakout Board
Insert the UART-to-USB board as shown in the image below:
4. Update the Firmware Using FlashMagic
The software (FlashMagic) required to load the firmware is a free download at:
http://www.flashmagictool.com/
Flash Magic is a PC tool for programming flash based micro-controllers from NXP using a serial or Ethernet protocol while in the target hardware.
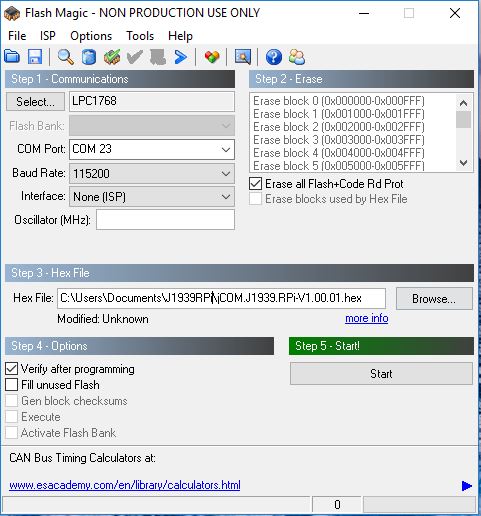
The above image shows the settings you need to apply. The only difference in your setup would be the choice of COM Port and the location and name of the .hex file.
Programming the Device
- Connect the USB cable to your PC (unless already connected)
- Start FlashMagic and select COM port and .hex file location
- Make sure that all other settings match those in the image above
- On the jCOM board do the following:
- Close (i.e. connect) the ISP jumper
- Close the RST jumper
- Open the RST jumper
- Open the ISP jumper
- In the FlashMagic program click on Start
5. Reset the Board
After the flash programming process has finished, close FlashMagic, then reset the board, either by shortly jumpering RST or initiating a power-cycle. Check the new functionality by starting the "C" program again and check the version number as described previously.