Loading... Please wait...
Recent Posts
"C" Programming The SAE J1939 Turbo Interface for Raspberry Pi
Posted by on
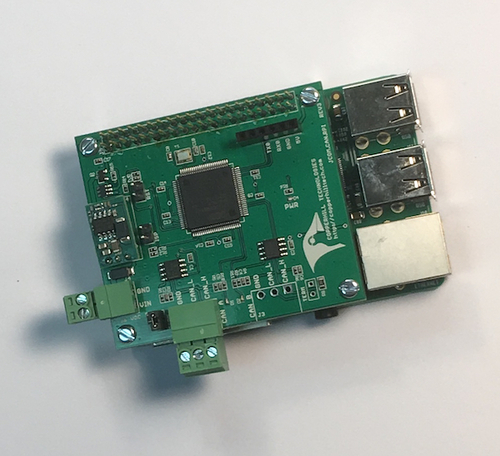 The jCOM.J1939.RPi, an SAE J1939 interface for the Raspberry Pi, is not an RPi HAT in the common sense. The board incorporates an ARM processor with CAN transceiver for use on the Raspberry Pi while allowing the operation with any other RPi-compatible board.
By combining our J1939 port interface, the Raspberry Pi, an SAE J1939 cable, and open-source software libraries, you are ready to go with powerful a turn-key RPi-based J1939 bus solution. Leverage the vast processing capability of the Raspberry Pi plus the built-in CAN port for your next prototype.
In order to more efficiently serve automotive applications, the jCOM.J1939.RPi board supports an optional extended input power range of 7 to 36 VDC to power the entire system, i.e. including the RPi itself.
The board supports the full SAE J1939 protocol according to J1939/81 Network Management (Address Claiming) and J1939/21 Transport Protocol (TP). It is also supported by an extensive programming interface for the Raspberry Pi, including full C source code for short time-to-market developments.
The strength of the board lies in the fact that the entire SAE J1939 protocol, including all timing requirements, is stored on-chip, thus taking the burden off the Raspberry Pi CPU. The board uses a USB COM port to communicate with the RPi, i.e. all data transfer is handled through standard COM port access (/dev/serial0 - which is the default - or /dev/ttyAMA0, depending on serial operating mode). The communication protocol between the board and the main system is well documented, and working source code library exists for the Raspberry Pi (C using the standard gcc compiler).
With all its features, the jCOM.J1939.RPi allows the simulation of an SAE J1939 ECU (Electronic Control Unit) using embedded solutions such as the Raspberry Pi.
Important!
The following description refers to the initial release and the actual code may change over time due to firmware updates. The basic functionality is still the same, but please refer to the jCOM.J1939.RPi product page and read the information regarding firmware updates.
Also Important!
It may sound obvious, but it is, nevertheless, overseen frequently: You will need a second SAE J1939 node (or an entire network) to check the board's full functionality. The board comes with a "heartbeat" function (i.e. a heartbeat message sent per serial port every one second), which indicates that the board is "awake" and working, but that doesn't proof any SAE J1939 functionality.
On-Board LEDs
The jCOM.J1939.RPi board comes with two LEDs:
- PWR - Directly connected to power.
- CAN A - Indicates USB port activity (including heartbeat message)
Programming the jCOM.J1939.RPi Using C
The jCOM.J1939.RPi C source code contains of the following files:
- main.c
- config.h
- COM1939.c
- COM1939.h
- CANInterface.c
- CANInterface.c
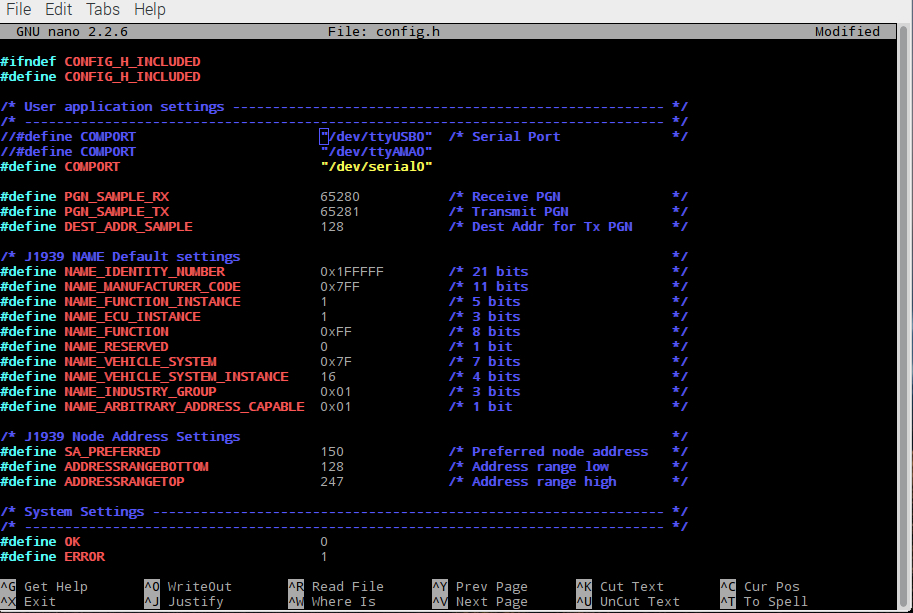
The config.h file is important, because it allows some user/application settings such as:
- Preferred Node Address (for Address Claim Process)
- Negotiable Node Address Range (also for Address Claim Process)
- ECU NAME
The COM1939 and CANInterface modules manage the communication between the Raspberry Pi and the jCOM.J1939.RPi board. These modules need no further detailed attention, unless you want to spend the time to understand and extend them.
The most important module, when it comes to mere application programming, is main.c.
To initialize the board, use the following lines:
strcpy(sCOMPort, COMPORT);
COM1939_Initialize(&sCOMPort[0]);
COM1939_SendMessageMode(MSGMODE_GATEWAY2);
Please note: COMPORT is defined in the config.h file. For the jCOM.J1939.RPi board, COMPORT can be either \dev\serial0 (default) or \dev\ttyAMA0, depending on the serial port's operating mode. For further information, see the document "Enable Serial Port On The Raspberry Pi", which you can find on the jCOM.J1939.RPi product page.
In order to call the SAE J1939 protocol stack, you need only one line:
int nStatus = COM1939_Receive(&lPGN, &nPriority, &nSourceAddress, &nDestAddress, &nData[0], &nDataLen);
This function call receives messages from the J1939 network. However, before you can receive any messages, you will need to set message filters for the PGNs you need:
COM1939_AddFilter(PGN_SAMPLE_RX);
PGN_SAMPLE_RX is defined in config.h and it can be replaced with any PGN. And, of course, you can add more PGNs using the same function call (up to 80 PGNs).
To negotiate an address, use this line:
COM1939_SetProtocolParameters(msgNAME, SA_PREFERRED, ADDRESSRANGEBOTTOM, ADDRESSRANGETOP, OPMODE_EVENT, true);
Again, all parameters are set in config.h.
Please, be aware that you need a valid J1939 node address before you can transmit data into the network. To transmit data, use the following line:
COM1939_Transmit(6, PGN_SAMPLE_TX, nSA, DEST_ADDR_SAMPLE, &SampleTxData[0], 8);
For further details, have a closer look at the main.c file. The code explains all functionality is an easy-to-comprehend form.
Compile and Run the C Program
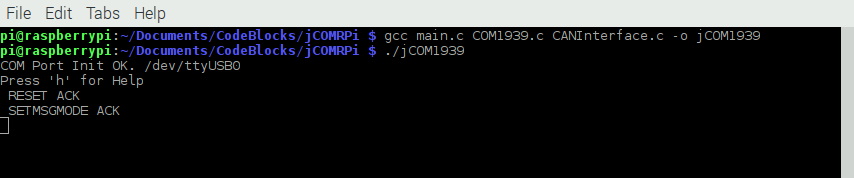
In order to compile the program, run the following command in terminal mode:
gcc main.c COM1939.c CANInterface.c -o jCOM1939
Naturally, you can use any other name than jCOM1939 for the executable file.
To run the program, type:
./jCOM1939
Further Information
Download the C Source Code
All sample programs and other code samples and projects as introduced on this website are free software; you can redistribute and/or modify them. The programs are introduced in the hope that they will be useful, but WITHOUT ANY WARRANTY; without even the implied warranty of MERCHANTABILITY or FITNESS FOR A PARTICULAR PURPOSE. With downloading any of these programs, you confirm that these code samples and projects were created for demonstration and educational purpose only.
Some Screen Shots
To edit or view any of the program modules use the internal editor, for instance:
nano config.h
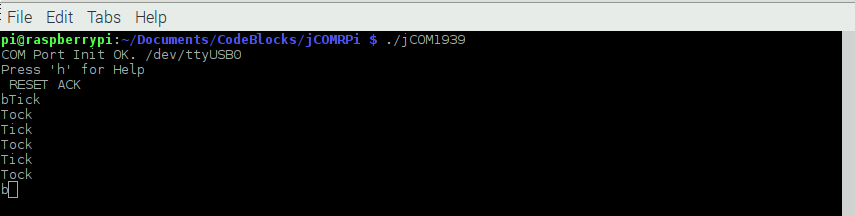
After executing the jCOM1939 program, the screen will show the COM port status, either successful (as shown here) or with an error message:
Type 'h' for help:

Type 'b' to check the reception of the heartbeat message:
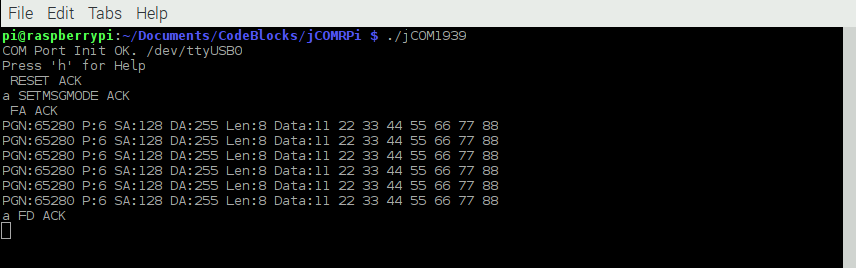
Type 'f' to apply the message filter, type 'd' to delete the message filter:
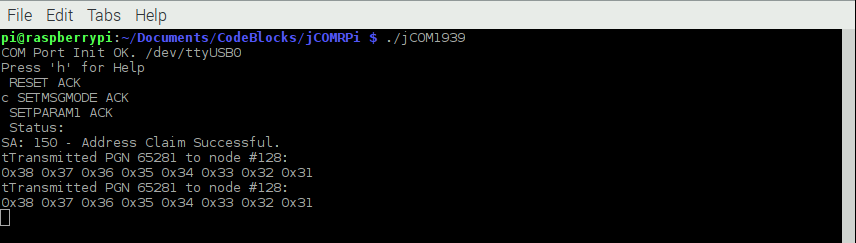
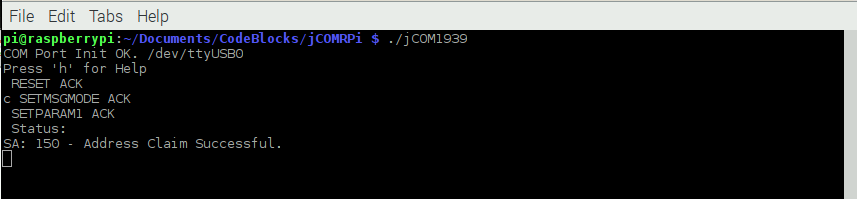
Type 'c' to initiate the address claim process:
Type 't' to transmit a J1939 data frame: