- Home
- Literature
- Thomson Electrac HD Linear Actuator Motion Control per CAN Bus
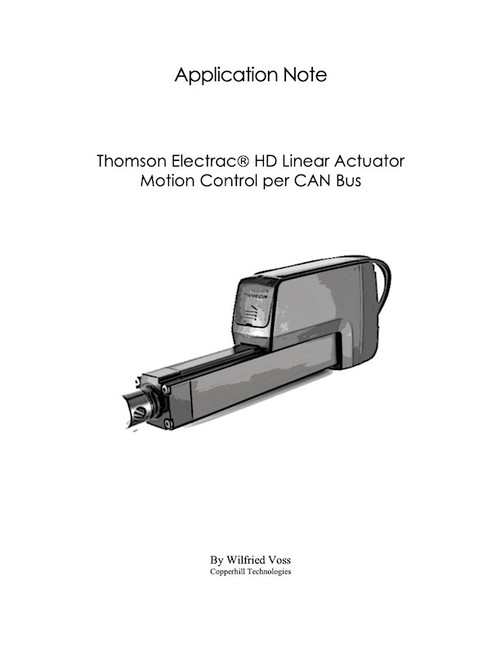
Thomson Electrac HD Linear Actuator Motion Control per CAN Bus
Product Description
Application Note with Free Downloadable Source Code
The Electrac series of actuators supports two higher-layer protocols based on Controller Area Network (CAN): CANopen, and SAE J1939. You can control the actuators merely with hardware switches (Start, Stop, Forward Motion, Backward Motion), but, in addition, both CAN protocols allow to regulate the linear speed.
If your application requires mere motion control (Start, Stop, Forward Motion, Backward Motion, Speed Control), you are better off with SAE J1939 because you don’t need to install the protocol stack. The Electrac actuator supports some SAE J1939 protocol features (e.g., the address claim procedure), but you can ignore the protocol requirements and control the linear motion with mere CAN Bus data frames (using a 29-Bit message identifier). Thus, “CAN Bus communication” describes the operation mode more accurately.
The CAN/J1939 approach will shorten the development cycle tremendously, which is why I focus on SAE J1939 in this application note and not CANopen.
I dare say, in view of various undocumented eccentricities, I cannot recommend programming the Electrac per CAN/J1939 without reading this document. After all, the Electrac user manual was not written for programmers.
Buy and Download the EBook (EPUB):
Price: US$9.99
Publication Date: Mar 1, 2023
Language: English
ISBN 9781312847682
Category: Computers & Technology
Copyright: All Rights Reserved - Standard Copyright License
By (author): Wilfried Voss
Buy and Download the Kindle Version:
Click on image to buy the Kindle version...
Table of Contents
Introduction
As part of a customer project, I was asked to develop a hardware system to control a linear actuator, specifically the Thomson Electrac HD model with SAE J1939 interface. The Electrac series of actuators supports two higher-layer protocols (HLP) based on Controller Area Network (CAN): CANopen, and SAE J1939. CANopen is suited for industrial automation, while SAE J1939 was designed for diesel engines (trucks, trains, ships, tanks, tractors, and more). You can control the actuators merely with hardware switches (Start, Stop, Forward Motion, Backward Motion), but, in addition, both CAN protocols allow to regulate the linear speed.
At first glance, CANopen appears to be more suitable for controlling a linear actuator in industrial applications, but that is only true when you are already involved with CANopen, i.e., you know how to implement a CANopen protocol stack (which is not a small feat).
However, if your application requires mere motion control (Start, Stop, Forward Motion, Backward Motion, Speed Control), you are better off with SAE J1939 because you don’t need to install the protocol stack. The Electrac actuator supports some SAE J1939 protocol features (e.g., the address claim procedure), but you can ignore the protocol requirements and control the linear motion with mere CAN Bus data frames (using a 29-Bit message identifier). Thus, “CAN Bus communication” describes the operation mode more accurately.
The CAN/J1939 approach will shorten the development cycle tremendously, which is why I focus on SAE J1939 in this application note and not CANopen.
Before You Start That Development…
I added this paragraph to support your decision of whether to use an Electrac Linear Actuator and what parameters to consider making that decision. As you will find throughout this application note, I discovered a few undocumented side effects affecting (and delaying) the development process. This application note is based on my experience with one particular version of the Electrac Linear Actuator. The assumption is that my findings and the resulting code will work on different types of Thomson actuators that support CAN/J1939 communication.
The first probable step during your development process will be the selection of the actuator based on required linear length and speed. However, there are further parameters that are not that obvious to the newcomer to the technology. For instance, the commonsense assumption is that you can control a linear actuator in a speed range from zero to maximum supported speed. That, however, is not the case.
According to the Thomson Electrak user manual, the "PWM driver will not provide enough voltage for the motor to operate properly under 20% utilization, therefore 20% should be considered a lower limit for speed control." In other words, the minimum speed of the linear actuator is at 20% of the maximum speed. Furthermore, the speed control resolution is at 5%, leaving the user with 16 distinctive speed levels.
However, this does not address the full extent of the limitations involved. There is a second, undocumented speed limit, somewhat higher than the minimum speed, at which the motor can run but cannot start when this speed is applied at motion start. I call this the "threshold speed,” and it depends on the gear's condition, i.e., older gears require a higher threshold speed due to mechanical wear (There is a workaround explained in chapter Managing the Threshold Speed).
Furthermore, please be aware that the actuator will never reach either the minimum or maximum position as shown in the data sheet. The actuators I used were specified at 4000 mm stroke length. The real-world numbers were ~20 mm for minimum (null) position and ~3980 mm for maximum position. I recommend selecting a stroke length slightly longer than your requirements unless these tolerances are acceptable.
The most serious issue with the Electrac Linear Actuators is the use of multiple actuators in the same network. If you need total control of two or more actuators and your setup runs on battery (such as a truck or train environment), do not use the same network but rather control them per individual, galvanically isolated CAN/J1939 ports. As I explain in chapter Multiple Actuators in the Same Network, two or more actuators in the same network will create endless CAN/J1939 data traffic, effectively killing the “sleep” feature and draining the battery.
Also, read my comments on Testing Approach. They contain some valuable information about what aspects are important for the development process. The point is, before working with a linear actuator, you need to decide to what degree these circumstances impact your application. Consequently, before starting that development, please take your time to study the user manual and work through this application note.
The Scope of this Application Note
This application note focusses on the Thomson Electrac HD model with SAE J1939 interface. And while the actuator supports the CAN Bus and SAE J1939 communication protocol, we utilize the mere CAN Bus control to keep things simple and reduce coding efforts.
The control hardware is an Arduino Due ECU development board with CAN Bus interface. However, the “C” code to control the actuator can be used in any other embedded system, even a Windows/Linux PC, with the understanding that these systems will require a CAN Bus interface with adapted driver software (API).
The demo code demonstrates the basic motion control features, such as Start, Stop, Forward Motion, Backward Motion, and Speed Control per potentiometer. To be more precise, I will present two versions, which I tagged “basic” and “extended.” The basic version is fully functional but lacks some features for advanced operations. The extended version adds functionality, such as the detection of minimum and maximum position, and it addresses the actuator’s oddities (and, consequently, my grievances).
This application note does not cover the safe operation of multiple linear actuators. The “basic” sample code offers the operation of two linear actuators but only for demonstration purposes. Neither code sample addresses topics such as speed and position synchronization.
The development environment is the Arduino IDE (Integrated Development Environment).
The Thomson Electrac HD Linear Actuator
What is a Linear Actuator?
Download the User Manual
A Brief Introduction to CAN Bus and SAE J1939
Controller Area Network
SAE J1939
Controlling the Thomson Actuator
Manual Control
Software Control
Node Address Configuration
Sleep Mode
Actuator Control Message (ACM)
Actuator Feedback Message (AFM)
Safety Considerations
Testing Approach
Programming Hardware & Software
Arduino Due & Arduino IDE
Dual CAN Bus Interface
Control Connections
CAN Bus Connection
ARD1939 – SAE J1939 Protocol Stack for Arduino
CAN Bus & SAE J1939 Communication Protocol
Designing the ACM
Interpreting the AFM
Example Programs – Basic & Extended
Basic Version
Extended Version
Download Links
Hardware Connections & Programming Notes
General Aspects
Timer Control
Reading an Analog Signal from a Potentiometer
Reading Digital Signals (Switches, Pushbuttons)
Building the Actuator Control Message (ACM)
Handling the Actuator Feedback Message (AFM)
The Startup Sequence
Checking the CAN Bus Connection
Managing the Threshold Speed
Checking Motion End
Thomson Actuator – Oddities
CAN Bus Termination
Fatal Error Flag at Low Speed
Overload Flag at Power-Up
Multiple Actuators in the Same Network
Programming Arduino Getting Started with Sketches
by Simon Monk
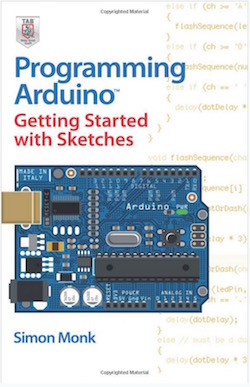 Clear, easy-to-follow examples show you how to program Arduino with ease! "Programming Arduino: Getting Started with Sketches" helps you understand the software side of Arduino and explains how to write well-crafted Sketches (the name given to Arduino programs) using the C language of Arduino. This practical guide offers an unintimidating, concise approach for non-programmers that will get you up and running right away.
Programming Arduino: Getting Started with Sketches explains basic concepts and syntax of C with simple language and clear examples designed for absolute beginners - no prior knowledge of programming is required. It leads you from basic through to advanced C programming concepts and features dozens of specific examples that illustrate concepts and can be used as-is or modified to suit your purposes.
- All code from the book is available for download.
- Helps you develop working Sketches quickly.
Coverage includes: C Language Basics; Functions; Arrays, Strings; Input / Output; Standard Library Goodies; Storage; LCD Displays; Programming for the Web; Program Design; C++ and Library Writing
 Loading... Please wait...

