Blog
Recent Posts
LPC1768/1769 - ARM Cortex M3 Development - The "Hello World!" Application
Posted by on
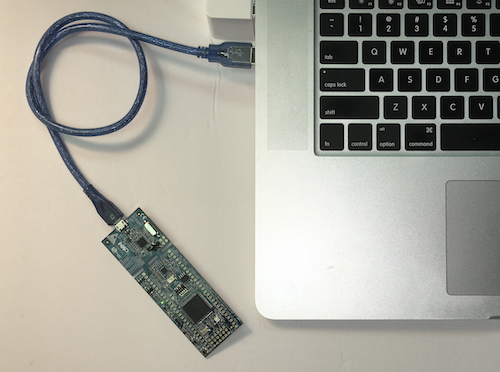
This post is a follow-up on my article LPC1768/1769 - ARM Cortex M3 Development - MCUXpresso IDE Installation And Adding A Template Project, in which we installed the MCUXpresso integrated development environment (IDE) and created a working but non-functional project for the LPC1768/LPC7169 processor.
You can start the compilation (click on "Build 'LPC1769Template' [Debug]"), and there will be no error messages, but the program will just hang out in an endless loop without doing anything at all.
So, for a first project, I have developed some code that uses the onboard resources, in this case the onboard LEDs and the MUC's internal timers (a blinking LED is the embedded version of the ever-popular "Hello World!" application).
Note: The following code examples are designed for two products we sell through this website:
- Open1768 - LPC1768 ARM Cortex M3 Development Board
- LPC1769 - ARM Cortex M3 Starter Kit And Development Board
Parts of the sample code will work on other hardware platforms, but will require modifications. Please understand that we are unable to provide support for any hardware not listed above.
In the following, I will describe how to copy the sample code into the project. These steps are almost identical between the LPC1768 and LPC1769 hardware, and I will point the differences where applicable.
Download the sample application files
There are two categories of files that need to be copied, C source code file and header files. I have combined both into one zip file with the following folder structure:
LPC17xx -> inc
-> src
where LPC17xx represents either LPC1768 or LPC1769, depending on which board you are using.
Unzip the files and store them into a folder of your choice.
Copying the sample application into the project folder
Open the MCUXpresso IDE.Also open the folder where you copied the content of the zip file.
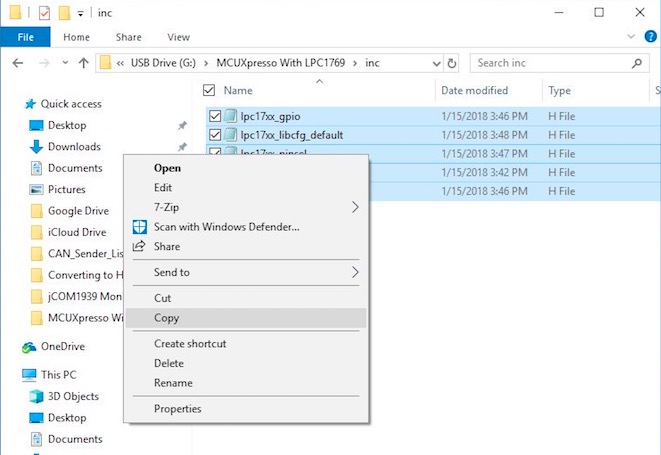
In Windows Explorer select and copy all files of the inc folder.
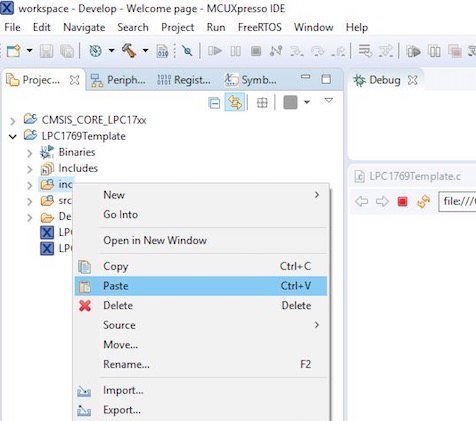
Switch over to the MCUXpresso IDE and right-click on the inc folder of the project, then click Paste.
Do the same with the src folders. Make sure, you save the project before proceeding. In the project folders, you should see now:
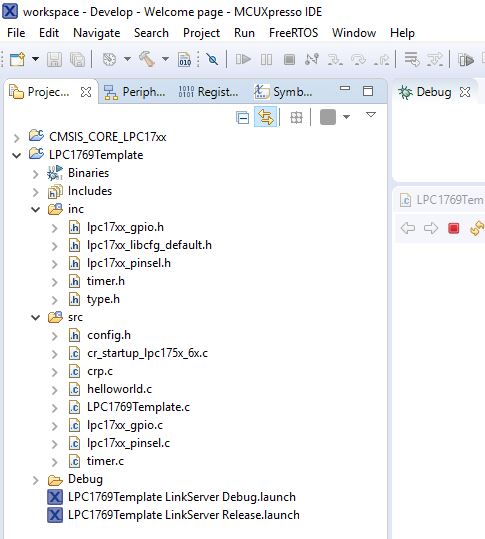
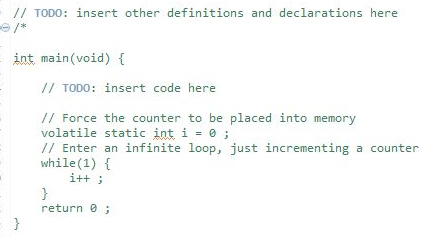
At this point, we are not quite ready to compile the application and load it onto the board, because we have added a second main() function. The original main() function is in the LPCTemplate.c file, and the new one is located in HelloWolrd.c.
You can proceed in two ways: The easiest would be to simply delete the LPC1769Template.c file. However, I'd recommend to comment out the corresponding section in the file:
Running the application
Please make sure you have the debugging device connected to your computer before running the MCUXpresso IDE. In the Quickstart panel, click on:

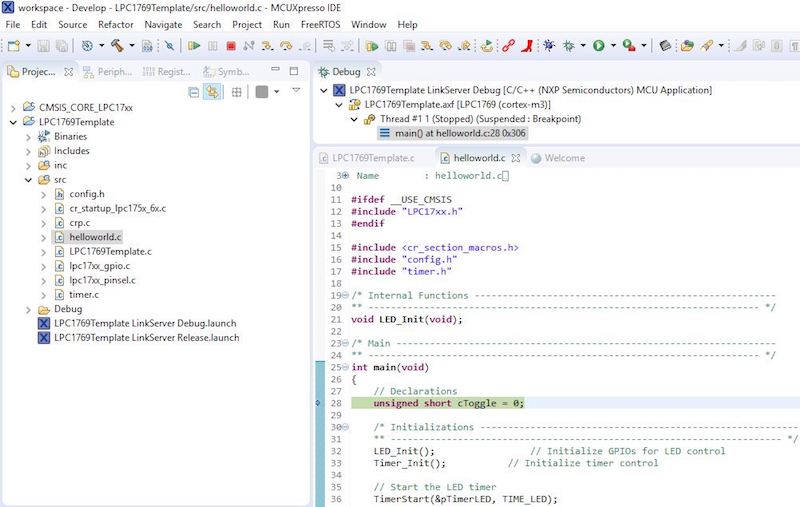
From now on, the IDE does what it needs to do to compile the code and load the code onto the development board. When it's done (assuming there are no errors), the IDE will point to the first executional code in the main() function. At this point, you are free to set breakpoints, if necessary. Click on the Play button on top of the IDE window to start the application.
The LEDs on the corresponding board, either the LPC1768 or LPC1769, will flash according to their corresponding patterns.
Note: Please understand that what I am providing here is a crash-course on ARM programming. There is much more to what the MCUXpresso IDE can do, but I will not repeat the existing, vast documentation that already exists. My goal is to get you going (and interested) as soon as possible.
The sample program I present here demonstrates two chapters of ARM programming, general purpose digital inputs and outputs (GPIO), and timers. I will follow up on both topics in the following posts:
- LPC1768/1769 - ARM Cortex M3 Development - Timer Programming... In Preparation...
- LPC1768/1769 - ARM Cortex M3 Development - GPIO Programming... In Preparation...
The Definitive Guide to ARM Cortex-M3 and Cortex-M4 Processors
This new edition has been fully revised and updated to include extensive information on the ARM Cortex-M4 processor, providing a complete up-to-date guide to both Cortex-M3 and Cortex-M4 processors, and which enables migration from various processor architectures to the exciting world of the Cortex-M3 and M4.
This book presents the background of the ARM architecture and outlines the features of the processors such as the instruction set, interrupt-handling and also demonstrates how to program and utilize the advanced features available such as the Memory Protection Unit (MPU).
Chapters on getting started with IAR, Keil, gcc and CooCox CoIDE tools help beginners develop program codes. Coverage also includes the important areas of software development such as using the low power features, handling information input/output, mixed language projects with assembly and C, and other advanced topics.
- Two new chapters on DSP features and CMSIS-DSP software libraries, covering DSP fundamentals and how to write DSP software for the Cortex-M4 processor, including examples of using the CMSIS-DSP library, as well as useful information about the DSP capability of the Cortex-M4 processor
- A new chapter on the Cortex-M4 floating point unit and how to use it
- A new chapter on using embedded OS (based on CMSIS-RTOS), as well as details of processor features to support OS operations
- Various debugging techniques as well as a troubleshooting guide in the appendix
- topics on software porting from other architectures
- A full range of easy-to-understand examples, diagrams and quick reference appendices
LPC1768/1769 - ARM Cortex M3 Development - MCUXpresso IDE Installation And Adding A Template Project
After getting your LPC1768 or LPC1769 Cortex-M3 Development Board, it is time to getting started with MCUXpresso IDE. In this Step by Step tutorial we will go through the process of creating projects in MCUXpresso IDE for Cortex-M series Microcontrollers by NXP(Founded by Philips) based on CMSIS (Cortex Microcontroller Software Interface Standard). MCUXpresso is a derivative [...]
The MCUXpresso Integrated Development Environment (IDE)
This page is part of a series of posts by Wilfried Voss titled NXP LPC17xx ARM Cortex-M3 Microcontroller - Programming Tips & Tricks, explaining the programming of embedded systems using the ARM Cortex-M3 processor. The MCUXpresso IDE brings developers an easy-to-use Eclipse-based development environment for NXP MCUs based on ARM® Cortex®-M cores, including, among many others, the LPC [...]
 Loading... Please wait...

