 Loading... Please wait...
Recent Posts
LPC1768/1769 - ARM Cortex M3 Development - MCUXpresso IDE Installation And Adding A Template Project
Posted by on
")
After getting your LPC1768 or LPC1769 Cortex-M3 Development Board, it is time to getting started with MCUXpresso IDE. In this Step by Step tutorial we will go through the process of creating projects in MCUXpresso IDE for Cortex-M series Microcontrollers by NXP(Founded by Philips) based on CMSIS (Cortex Microcontroller Software Interface Standard). MCUXpresso is a derivative of LPCXpresso and Kinetis Design Studio IDEs with combined support for LCP and Kinetis MCUs. The IDE comes with integrated arm-gcc compiler and all the necessary debug drivers like LPC-Link, etc., to help you getting started with rapid embedded systems application development using our LPC17xx boards.
This guide is applicable for NXP’s Cortex-M MCU families like LPC800(e.g. LPC81x), LPC1100(e.g. LPC111x), LPC1300(e.g. LPC134x), LPC1700(e.g. LPC176x), LPC4300, etc. After creating MCUXpresso projects with CMSIS, the IDE will automatically add all the necessary startup files(for initializing MCU), headers and a project source file(C/C++) depending on the settings we choose while creating the project.
Download the IDE
You can download and install the IDE from the links as shown below:
- MCUXpresso
- You can always check the latest version @ MCUXpresso Software and Tools for ARM® Cortex®-M cores
After download, install from the setup file using default settings. During installation it will also install debug probe drivers which is also used to flash the code. Just click Yes/Next/Accept if its asks for driver install confirmation. By default the IDE will install to location – C:\NXP\MCUXpressoIDE_<version>\.
After install, follow the steps below to create a new project for either the LPC1768 or LPC1769. We have created two sample projects, one for our Open1768 - LPC1768 ARM Cortex M3 Development Board and another for our LPC1769 - ARM Cortex M3 Starter Kit And Development Board. The following documentation refers primarily to the LPC1769, but the project creation is identical for the LPC1768, and we have marked the sections where differences apply.
Step by Step Tutorial
Step 1: When you start MCUXpresso, it will first ask for a path to create a workspace. A workspace is like a master directory with settings and can contain many individual projects, more like a general “Projects” folder. When prompted enter the path where you want to create your workspace:
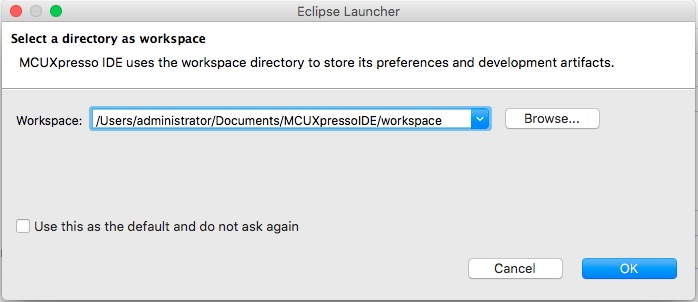
You can choose any path, but we recommend to go with the default settings. Please be aware that the IDE allows you to create several workspaces and to switch between them. In fact, we recommend to use this feature to separate projects in a logical order that fits your needs.
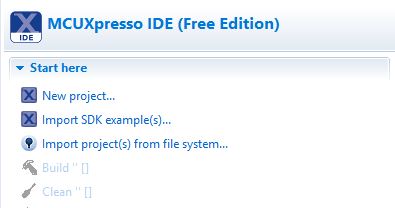
Step 2: In this step, we will create a new project that fits the requirements for the LPC1768 or LPC1769. The IDE will launch right after installation. Now, click on the "New Project..." link in the "Quickstart" panel (bottom left view of the IDE):
Step 3: The project wizard will open as shown below. Select the target MCU (1768 or LPC1769; our example refers to the LPC1769), the click Next:
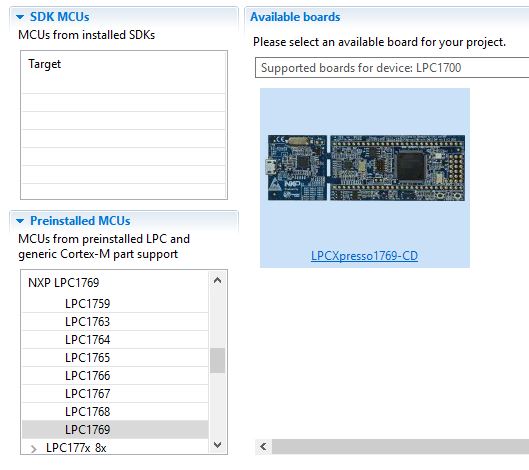
Note: The wizard will show a number of board images on the right, but their appearance is of no consequence for our project settings.
Step 4: Select "C Project," the click Next.

Note: Our initial code examples are written in "C". If and when the need arises, you can always open a new project with the "C++" settings.
Step 5: Enter a suitable name for your project, then click Next. In this example, we chose "LCP1769Template" (use "LPC1768Template" for the LPC1768 board), and we recommend following this naming convention. In further posts to follow, we will copy the template code and modify it to suit the chosen application.

Step 6: In this step, we install the CMSIS for the LPC1768 and LPC1769. However, before you continue, assure that the CMSIS is not already installed.
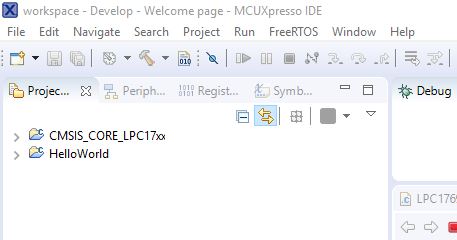
If you see a reference to CMSIS_CORE-LPC17xx in the IDE's project window as shown below, you should skip to step 7.
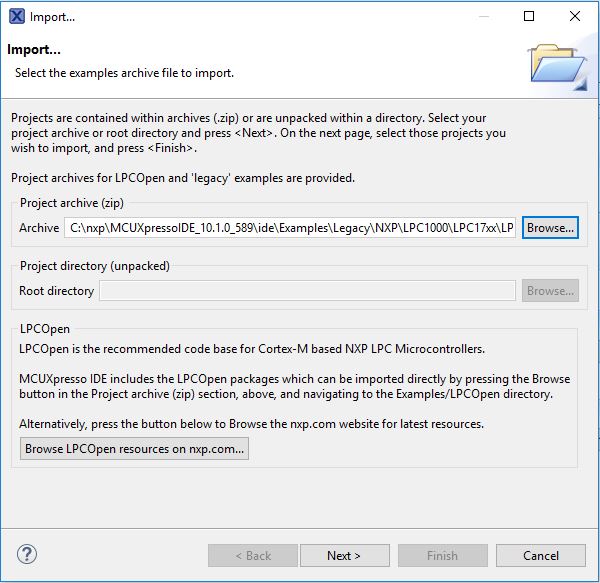
In order to install the CMSIS library, click on the Import button.
A new “Import…” window will appear. Click on “Browse” under “Project archive (zip)”. Then select the required CMSIS library zip file for your MCU family. It can be found under “ide\Examples\Legacy\NXP\LPC1000/LPC17xx" (for LPC17xx MCUs) inside the MCUXpresso installation directory.
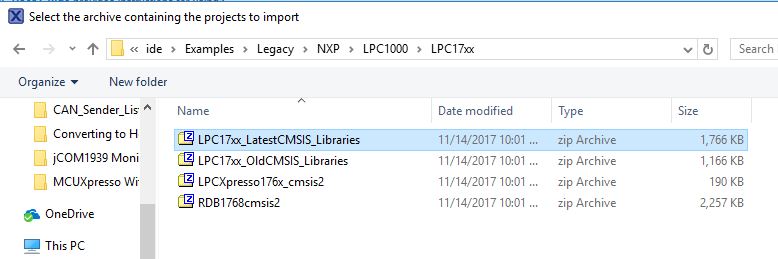
Select the "LPC17xx_LatestCMSIS_Libraries" file, then click Open.
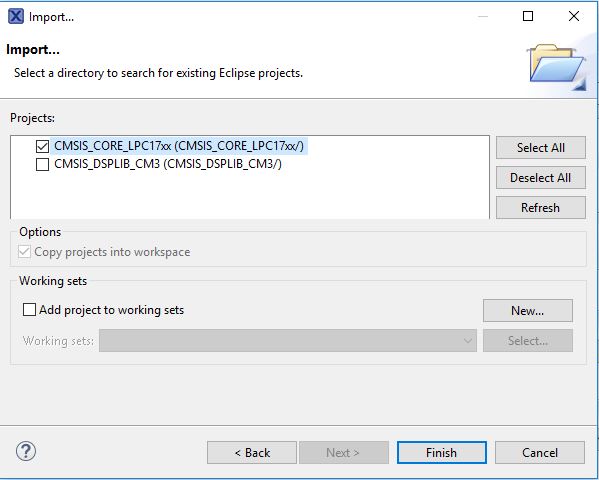
Click Next.
In the dialog below, select the CMSIS_DSPLIB_CM3 option only when you need the DSP library (not needed for our template code).
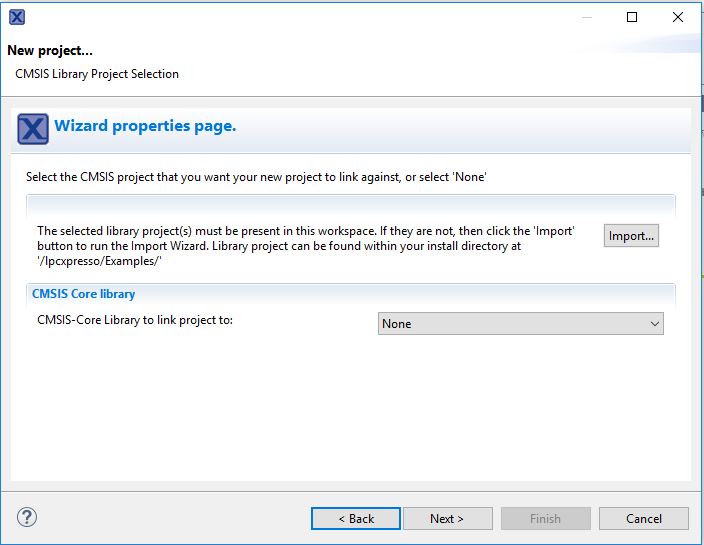
Step 7: Under “CMSIS Core library” select CMSIS_CORE_LPC17xx for the LPC1768/1769 MCU family and click Next.

Step 8: In the next window, click Next again.

Step 9: In the dialog window as shown below, select the option "Create 'inc' directory and add to path," then click Finish.
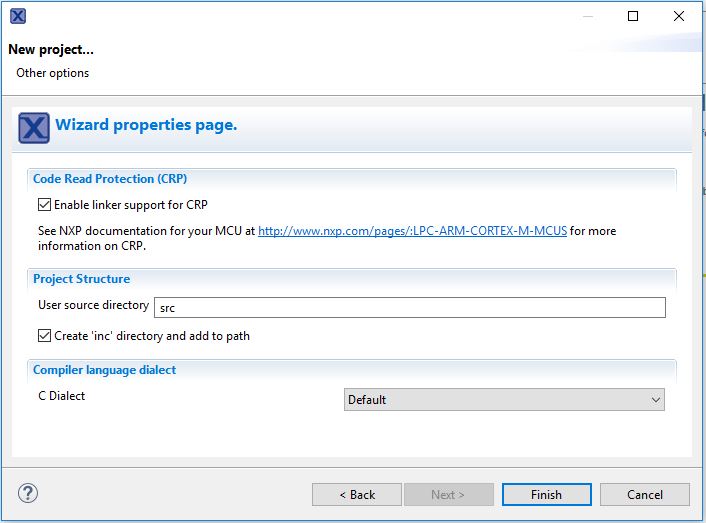
Note: We will use the 'inc' folder to add header files supporting access to various interface components on the board.
As of now, we have created a working core project, however, without any functionality.
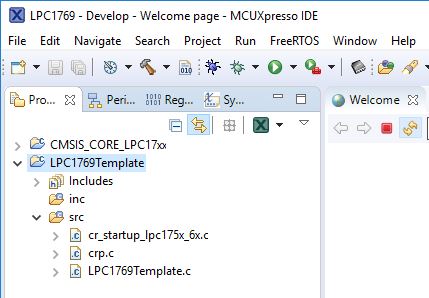
Looking at the LPC1769Template.c file, which contains the main() function), there are a few "TODO" sections.
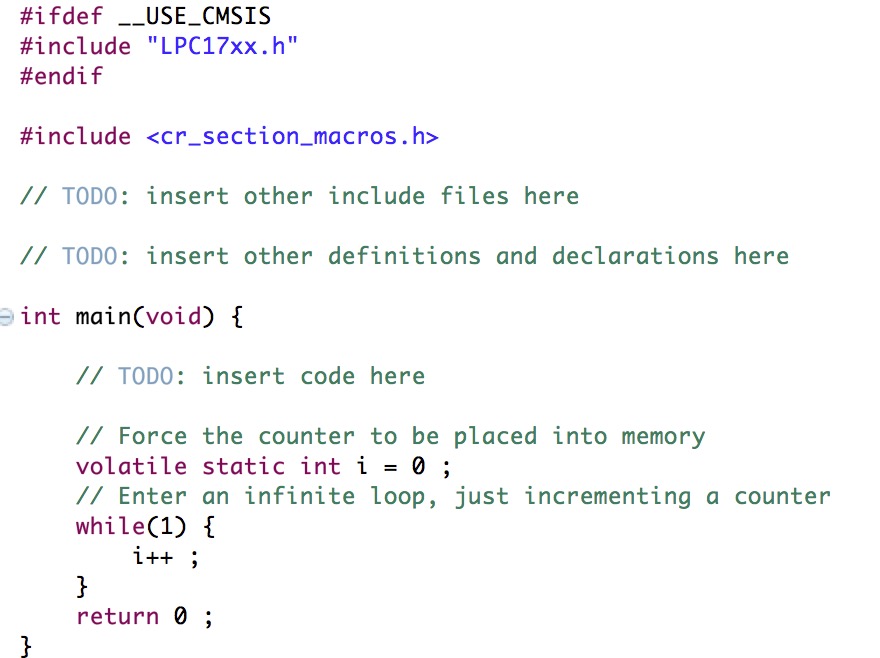
You can start the compilation (click on "Build 'LPC1769Template' [Debug]"), and there will be no error messages, but the program will just hang out in an endless loop without doing anything at all.
For a first project, I have developed some code that uses the onboard resources, in this case the onboard LEDs and the MUC's internal timers (a blinking LED is the embedded version of the ever-popular "Hello World!" application).
Reference:
The Definitive Guide to ARM Cortex-M3 and Cortex-M4 Processors

This new edition has been fully revised and updated to include extensive information on the ARM Cortex-M4 processor, providing a complete up-to-date guide to both Cortex-M3 and Cortex-M4 processors, and which enables migration from various processor architectures to the exciting world of the Cortex-M3 and M4.
This book presents the background of the ARM architecture and outlines the features of the processors such as the instruction set, interrupt-handling and also demonstrates how to program and utilize the advanced features available such as the Memory Protection Unit (MPU).
Chapters on getting started with IAR, Keil, gcc and CooCox CoIDE tools help beginners develop program codes. Coverage also includes the important areas of software development such as using the low power features, handling information input/output, mixed language projects with assembly and C, and other advanced topics.
- Two new chapters on DSP features and CMSIS-DSP software libraries, covering DSP fundamentals and how to write DSP software for the Cortex-M4 processor, including examples of using the CMSIS-DSP library, as well as useful information about the DSP capability of the Cortex-M4 processor
- A new chapter on the Cortex-M4 floating point unit and how to use it
- A new chapter on using embedded OS (based on CMSIS-RTOS), as well as details of processor features to support OS operations
- Various debugging techniques as well as a troubleshooting guide in the appendix
- topics on software porting from other architectures
- A full range of easy-to-understand examples, diagrams and quick reference appendices