 Loading... Please wait...
Recent Posts
SAE J1939 Electronic Logging Device (ELD) Simulation And Data Monitoring With Timestamp Under Linux
Posted by on

The following describes a method of sampling and recording SAE J1939 data to any Linux device, PC or Embedded. Naturally, in order to read and request SAE J1939 data, you will need additional hardware, such as a CAN Bus (Controller Area Network) interface board (unless you use an embedded Linux system with onboard CAN port).
The problem, however, is that you also need an SAE J1939 protocol stack, and not all Linux systems can provide full real-time control as required. Also, at the time of this writing, I am not aware of a commercially available J1939 protocol stack software for Linux. Yes, there are some source code products available in the market, but they are expensive (in the neighborhood of $5,000+) and they require some massive modification to run reliably under Linux.
We at Copperhill Technologies offer an alternative, low-priced solution in form of our SAE J1939 Gateway Module With USB Port, RTC, MicroSD Memory Card. The strength of the board lies in the fact that the entire SAE J1939 protocol, including all timing requirements, is stored on-chip, thus taking the burden off the Linux system. The board uses a USB COM port to communicate with the Linux device, i.e., all data transfer is handled through a standard COM port access. The board supports the full SAE J1939 protocol according to J1939/81 Network Management (Address Claiming) and J1939/21 Transport Protocol (TP). It is also supported by a well-documented programming interface for Windows and Linux/Ubuntu applications, including full C/C++/C# source code for short time-to-market developments.
The JCOM.J939.USB-X SAE J1939 Processor board is an extended version of our popular JCOM.J9139.USB-B SAE J1939 ECU Simulator Board With USB Port. The most significant difference is that the -X version supports a USB transfer rate of up to 480 Mbps, allowing higher data throughput. Also, the onboard real-time clock supports the timestamping of the SAE J1939 data frames (PGN).
Furthermore, the board comes with a MicroSD memory card slot, which opens the door to future applications such as a CAN Bus / SAE J1939 data logger.
The improved features are:
- Upgraded ARM Cortex-M3 processor with double Flash & RAM
- Supports Hi-Speed USB 2.0 transfer rate at up to 480 Mbps
- Additional UART-USB for onsite firmware programming
- Onboard Real-Time Clock (RTC) for CAN Bus message timestamp support
- MicroSD Memory Card support
- 4-position DIP switch (one for termination resistor, three for functionality settings)
Documents/Resources
- SAE J1939 Gateway Module With USB Port, RTC, MicroSD Memory Card...
- Communication protocol between the gateway and the host system...
- Download the JCOM1939Linux code (zip file)...
Programming The SAE J1939 Gateway Under Linux
First off all, in my test setup I connected the gateway's USB port to a Linux PC. The port (device file) will most likely be /dev/ttyACM0. You can use dmesg | grep tty to list all tty devices.
The gateway board also allows you connect to the USB programming port, which is a UART-to-USB port, by setting dip switch SW1 to ON. In this case, the baudrate is limited to 115,200 baud, and you need to use /dev/ttyUSB0 (see config.h file).
I also use a second gateway board to simulate J1939 data traffic, i.e. both devices are connected per CAN Bus.
The sample program I created demonstrates the most important features of the communication between the gateway and the Linux system. After startup, just type 'h' for Help.
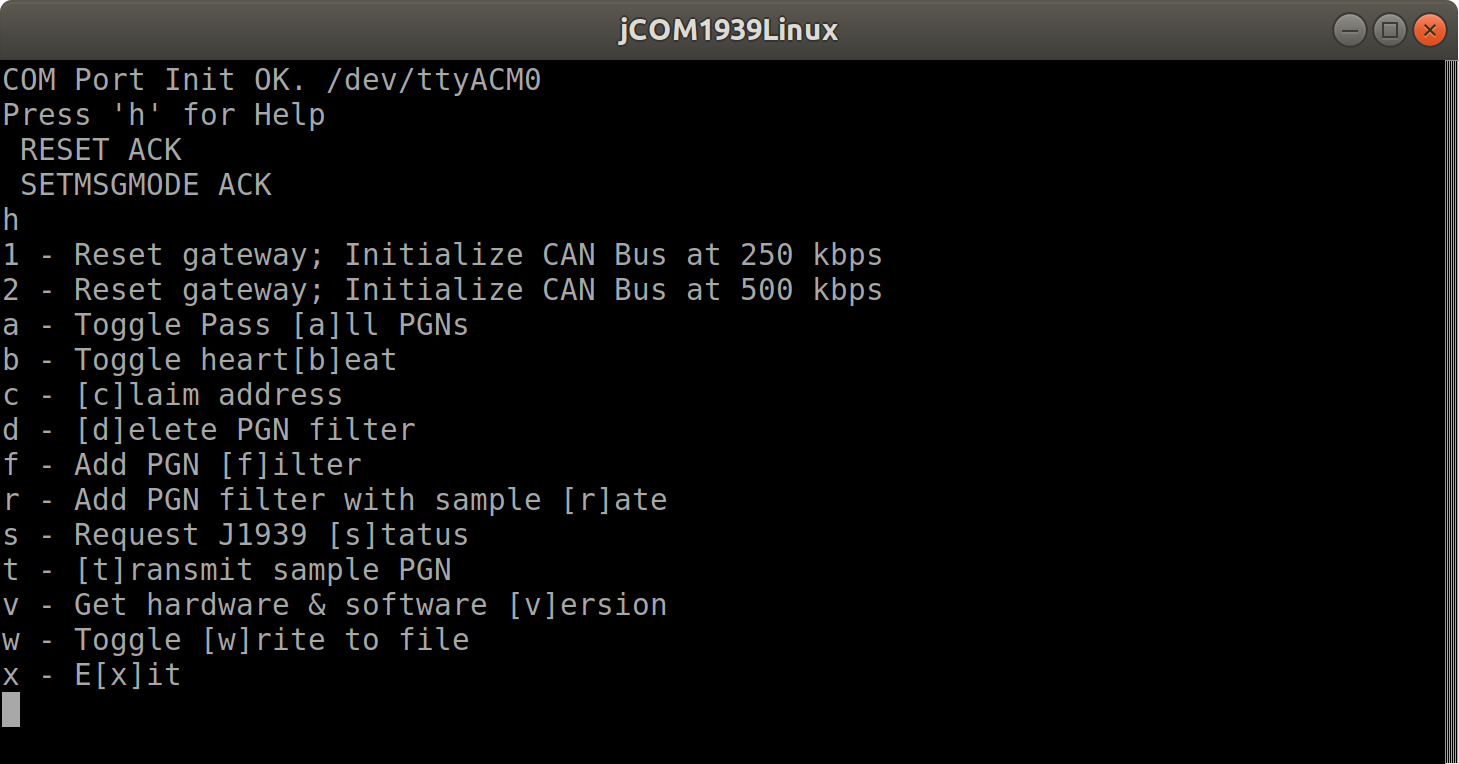
The above screenshot is pretty much self-explanatory, and I will not explain every feature. I just want to mention that you can also write the received J1939 data to a file ('w' command). In the following, I will demonstrate the reception and transmission of SAE J1939 data.
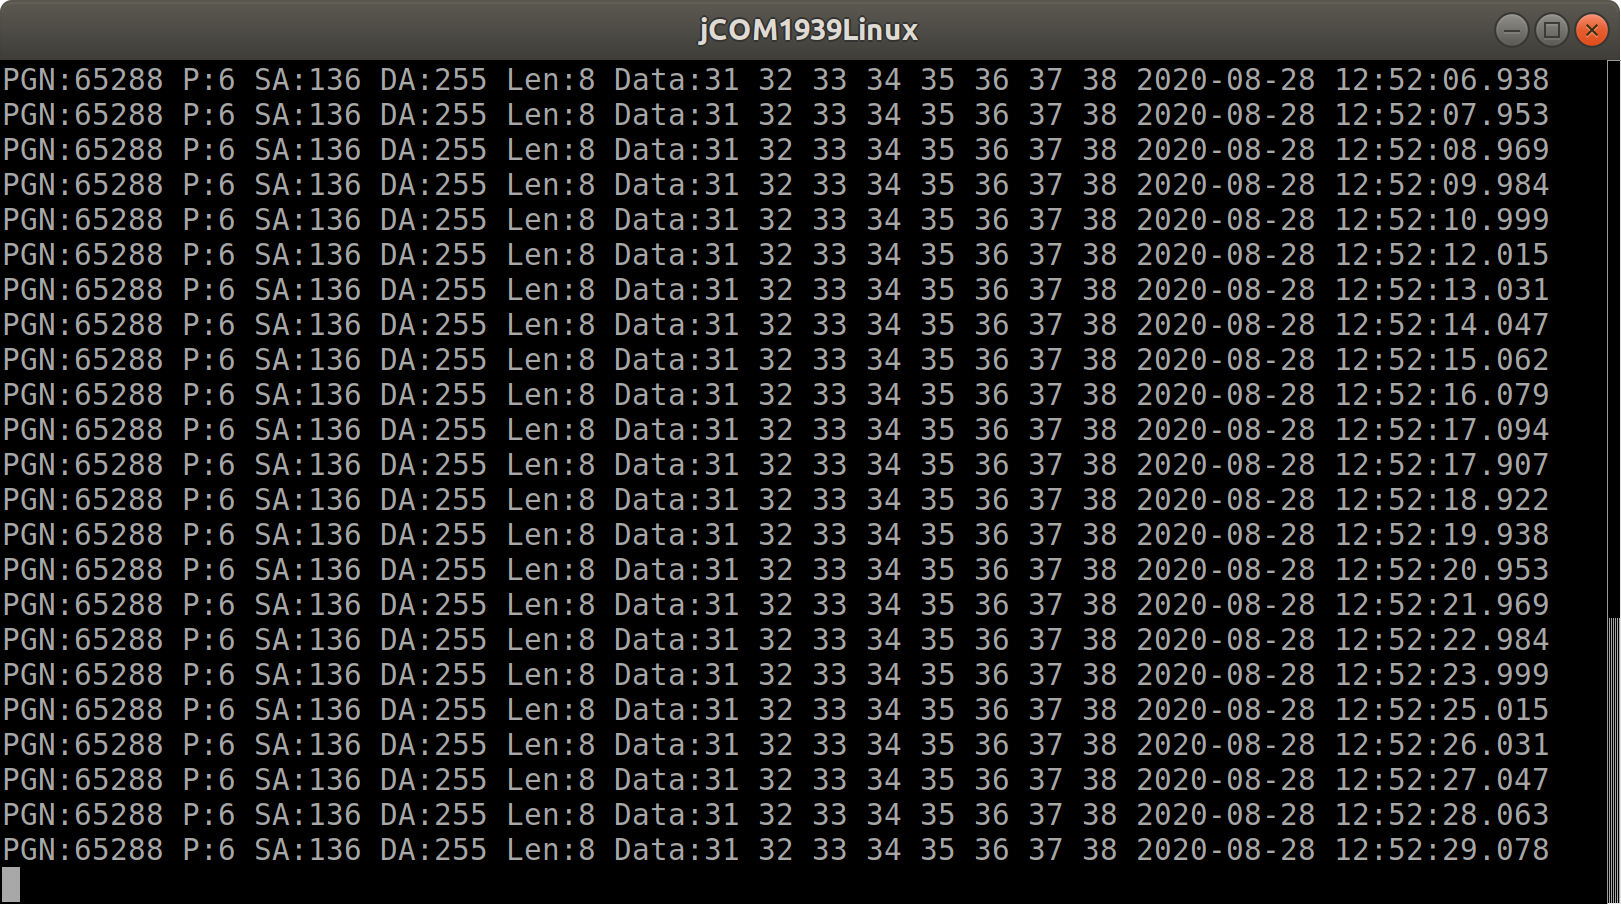
My J1939 data traffic simulator transmits PGN 65288 (randomly chosen) with a 200 millisecond frequency. As shown in the following screenshot, I hit 'r' to filter PGN 65288 and sample it at a rate of one second.
In the next example, I will transmit PGN 65281 (also randomly chosen) to the J1939 network. In order to do so, I first need to claim a node address by clicking 'c'. Then I hit 't' to transmit the PGN.
![]()
The JCOM1939Linux source code contains of the following files:
- main.cpp
- config.h
- COM1939.cpp
- COM1939.h
- CANInterface.cpp
- CANInterface.h
Note: I used the Code::Blocks IDE to develop and compile the code.
The COM1939 and CANInterface modules manage the communication between the Linux system and the gateway board. These modules need no further detailed attention, unless you want to spend the time to understand and extend the code.
The config.h file is important, because it allows some user/application settings such as:
- Preferred Node Address (for Address Claim Process)
- Negotiable Node Address Range (also for Address Claim Process)
- ECU NAME
- Sample Filter PGN
- Sample Transmit PGN
All sample programs and other code samples and projects as introduced on this website are free software; you can redistribute and/or modify them. The programs are introduced in the hope that they will be useful, but WITHOUT ANY WARRANTY; without even the implied warranty of MERCHANTABILITY or FITNESS FOR A PARTICULAR PURPOSE. With downloading any of these programs, you confirm that these code samples and projects were created for demonstration and educational purpose only.
 Updates, 2nd Edition")
Mastering Embedded Linux Programming: Unleash the full potential of Embedded Linux
Embedded Linux operates many of the devices we use every day, from smart TVs to WiFi routers, test equipment to industrial controllers. All of them have Embedded Linux at their heart. Linux is a core technology in the implementation of Internet-of-Things (IoT) applications.
This thorough guide explains the technologies and techniques needed to build Linux into embedded systems. You will begin by learning about the essential elements that underpin all embedded Linux projects: the toolchain, the bootloader, the kernel, and the root filesystem. You will learn how to build each of these elements from scratch and automate the process using Buildroot and the Yocto Project.