 Loading... Please wait...
Recent Posts
espBerry Project: ESP32 with CH9102F USB-UART Chip
Posted by on
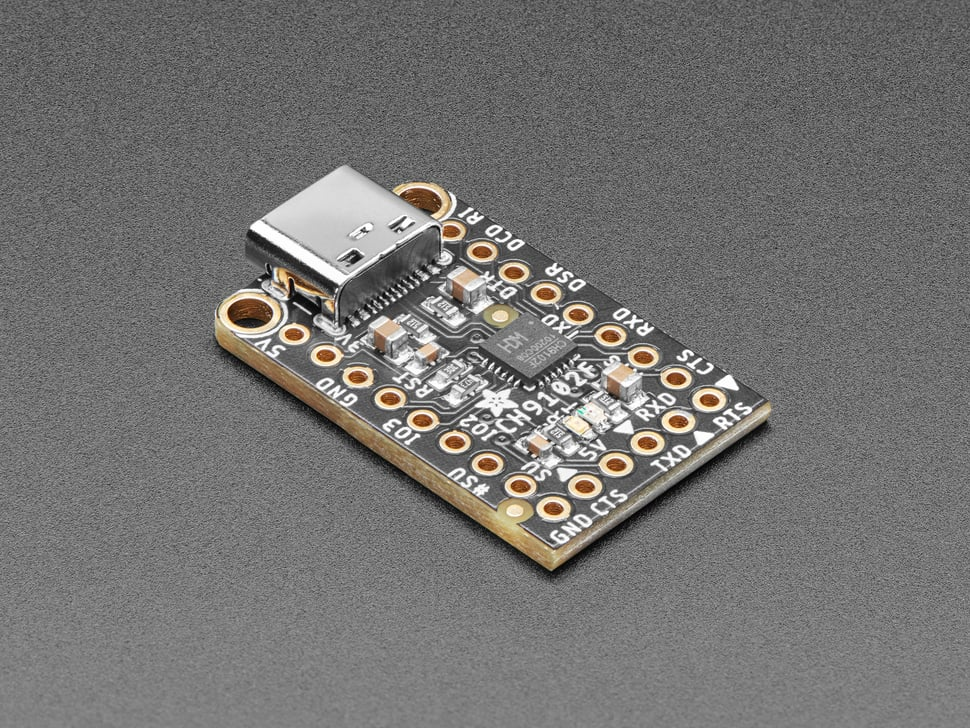
I have a project that involves the ESP32-DevKitC development board where the application requires the fast transport of data per USB. The onboard USB-UART bridge chip provides transfer rates of up to 3 Mbps. In addition, the ESP32 has three UART interfaces, i.e., UART0, UART1, and UART2, which provide asynchronous communication, communicating at a speed of up to 5 Mbps. This post describes the serial port programming per UART0, using the Adafruit WCH CH9102F Friend - USB to Serial Converter, which supports up to 3 Mbps.
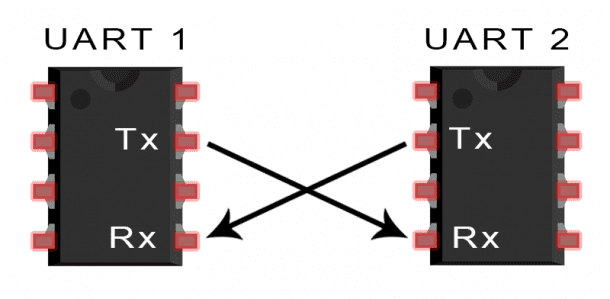
However, when working with the ESP32 under the Arduino IDE, you will notice that the Serial command works just fine but Serial1 and Serial2 do not. The ESP32 has three hardware serial ports that can be mapped to almost any pin. In order to get Serial1 and Serial2 to work, you need to involve the HardwareSerial class. As a reference, see ESP32. Arduino and 3 Hardware Serial Ports.
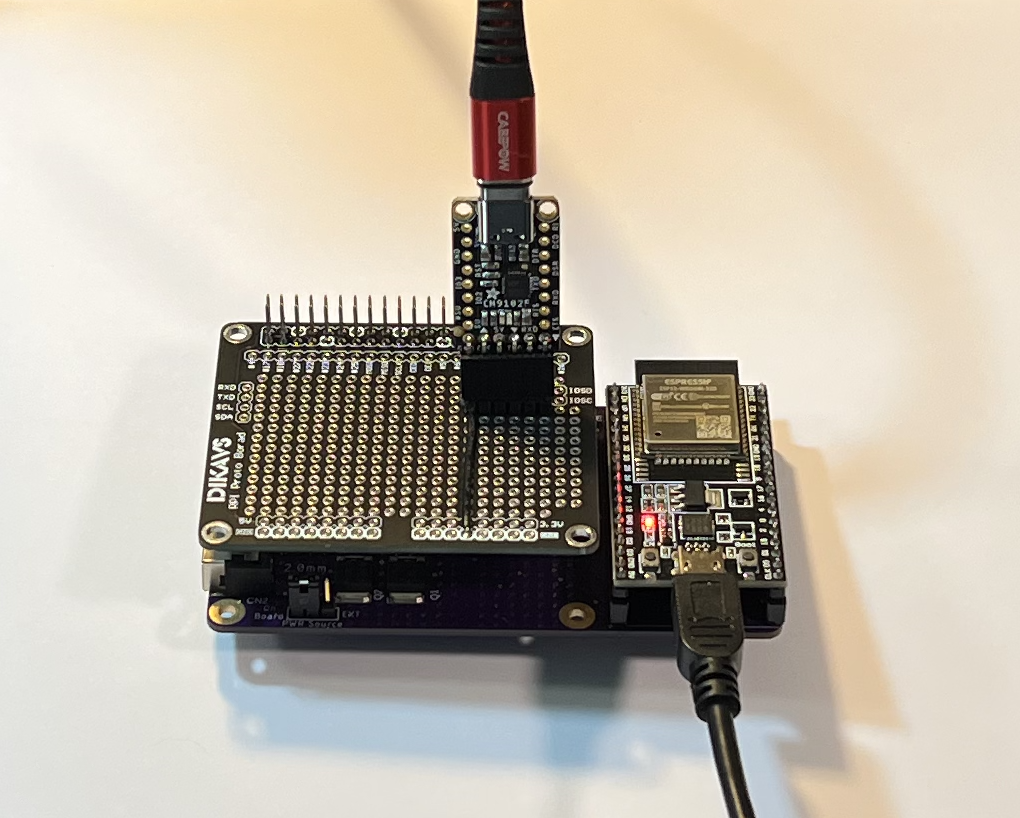
The above image shows my test setup, using our prototype board of the espBerry (which we plan to release in June 2023). The espBerry board turned out to be the best prototyping solution to quickly test the CH9102F USB-UART converter with the ESP32 processor.
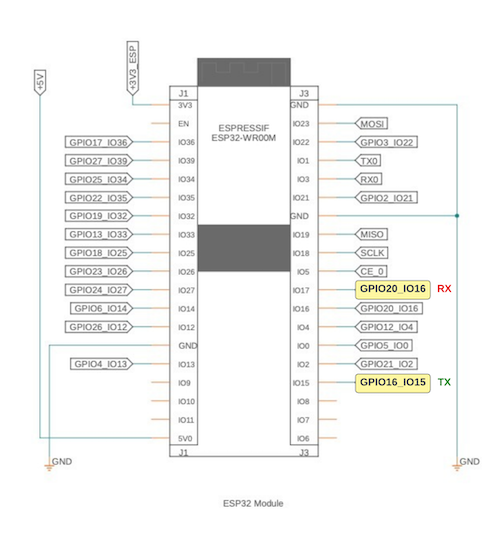
On the ESP32 Dev board, I assigned IO15 as Rx and IO16 as Tx, which are connected to GPIO16 and GPIO20 on the 40-pin header. as shown below:
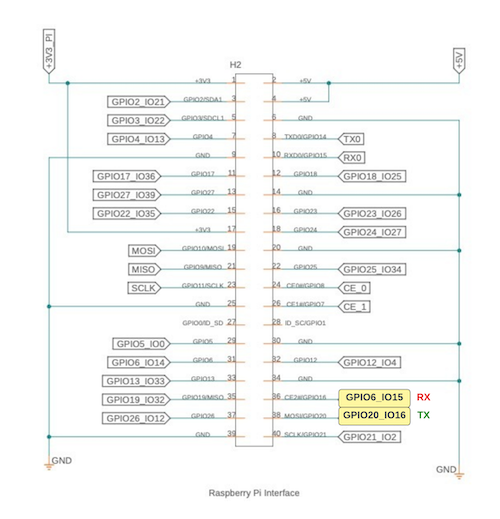
On the Raspberry Pi prototyping board, I connected the Rx, Tx signals (crossed as shown below) and Gnd.
The ADafruit website does not point to a schematic of the CH9102F breakout board or the pin assignment, but below image shows the location of Rx, Tx, and ground:
A specific driver installation was not necessary under Windows 10/11 (I tested both), i.e., the OS detected the device correctly without any problems, assigning it a COM port number.
I will not get into the details of my test program, since it's a mere printout of "Hello World!" per ESPSerial1.println. The crucial part is the setup of port as shown here:
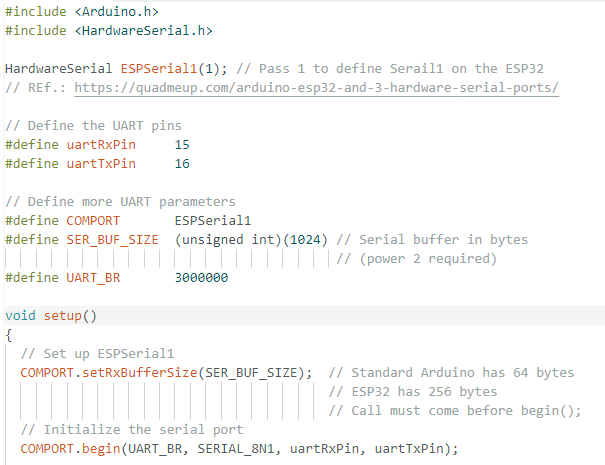
Using the above shown code enables you to access Serial1 (in above case named ESPSerieal1) using the regular Serial class functions, such as print, println, read, write, etc.
And while the program was easy to write, the hardware test turned out to be a bit more challenging. I used the regular Windows terminal apps, such as Realterm and TeraTerm. However, they accept only baud rates up to 921,600 baud. In addition, the Arduino IDE Serial Monitor may offer higher baud rates but they simply don't work.
Fortunately, a few years ago, I developed a VisualStudio C# code to simulate the Arduino IDE Serial Monitor, which allows me to modify the baud rate up to 3 Mbps and beyond:

Note: In my program, I read the COM port looking for inputs that, in turn, trigger the printout "Number One" and "Number Two."
The above image shows the communication at 3 Mbps, and I successfully tested serial data transferred in both directions. Click here to download the Visual Studio C# code I used for the Serial Monitor replication (.zip file).
 Electronics Projects with the ESP8266 and ESP32: Building Web Pages, Applications, and WiFi Enabled Devices
Copperhill Technologies highly recommends using this book for your wireless application projects. Yes, many good books and free online resources are available these days, but this is the book we are using. It made our approach to Bluetooth, BLE, and WIFI a breeze. Programming wireless applications without hassles was fun, and we will share them on this web page.
Projects throughout the book utilize the wireless functionality and processing power of the ESP microcontrollers. Projects are built in the Arduino IDE, so you don't need to download other programming software. In addition, mobile apps are now ubiquitous, making the app build projects of the book very relevant, as are the web page design projects.
In Electronics Projects with the ESP8266 and ESP32, you'll see how easy and practical it is to access information over the internet, develop web pages, build mobile apps to remotely control devices with speech recognition, or incorporate Google Maps in a GPS route tracking app.