Recent Posts
Interrupt-Controlled Timer Function For The Arduino Due
Posted by on
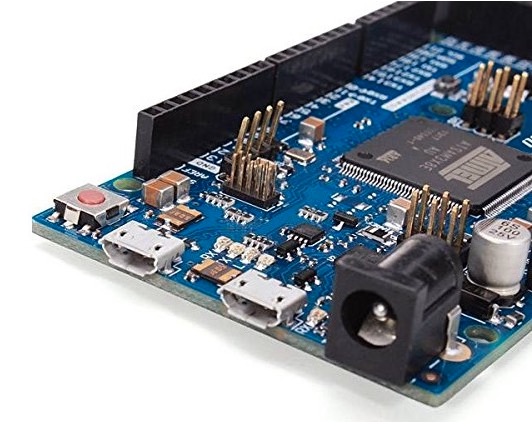
 The Arduino Due is a microcontroller board based on the Atmel SAM3X8E ARM Cortex-M3 CPU. It is the first Arduino board based on a 32-bit ARM core microcontroller. It has 54 digital input/output pins (of which 12 can be used as PWM outputs), 12 analog inputs, 4 UARTs (hardware serial ports), a 84 MHz clock, an USB OTG capable connection, 2 DAC (digital to analog), 2 TWI, a power jack, an SPI header, a JTAG header, a reset button and an erase button.
It may sound obvious, but there are many applications for the Arduino Due that will require at some time the control of timers. The Arduino compiler provides a number of timing control functions, and they are:
- millis()
- micros()
- delayMicroseconds()
- delay()
The problem with the delay functions is that they do what the function name implies, i.e. they delay the program and do virtually nothing in the meantime. When it comes to times beyond a few milliseconds, this may cause some serious trouble when it comes to manage other processes such as reading sensors, etc.
The millis() and micros() functions can be used to measure the time between two events, but for industrial-style timer management that will not do. Nevertheless, you can weave some code around these function calls to accomplish all kinds of timers, and I found two very nice examples in the Arduino Playground. They are:
The above samples will work with pretty much with every Arduino board. Nevertheless, since the Arduino Due comes with the power of an ARM Cortex M3 processor, it makes sense to use the Due's special capabilities and create a very precise, yet surprisingly simple timer control sketch.
The first task was to create a timer interrupt routine that is being called every one millisecond (a resolution of milliseconds is sufficient for the majority of control applications). I found a working solution at http://forum.arduino.cc/index.php?topic=130423.0 but modified the code slightly for ease-of-use.
In a next step, I created a structure as follows:
struct Timer
{
int nCount;
bool bStart;
bool bExpired;
};
Without going into too great detail, the structure is used by a few functions and their purpose is pretty much self-explanatory:
- TimerInit() - Initializes all timers as defined by the user.
- TimerStart() - Starts a timer using a user-defined time in milliseconds.
- TimerReset() - Resets a currently active timer.
The following code demonstrates the use of timers:
void setup()
{
TimerInit();
TimerStart(&Timer1, 1000);
}
void loop()
{
if(Timer1.bExpired == true)
{
TimerStart(&Timer1, 1000); // Restart the timer
// Do something here...
}
}
Overall, the code is very effective, i.e. very short, and the timer precision is extremely high.
Click here to download a more sophisticated (but still simple) version of the above code (zip file). The sketch prints the "Hello World!" text string in a slightly different way, i.e. it prints "Hello" every 500 milliseconds and "World" every 1000 milliseconds.
The timers as used are defined in the TimerControl.h header file. Please be aware that you will need to define the number of timers used in your application - See #define TIMERS...
Please feel free to contact me through the Contact Us page on this website in case you have questions or comments.
 Loading... Please wait...
