 Loading... Please wait...
Recent Posts
espBerry Project: ESP32 with NMEA 2000 & NMEA 0183 HAT
Posted by on
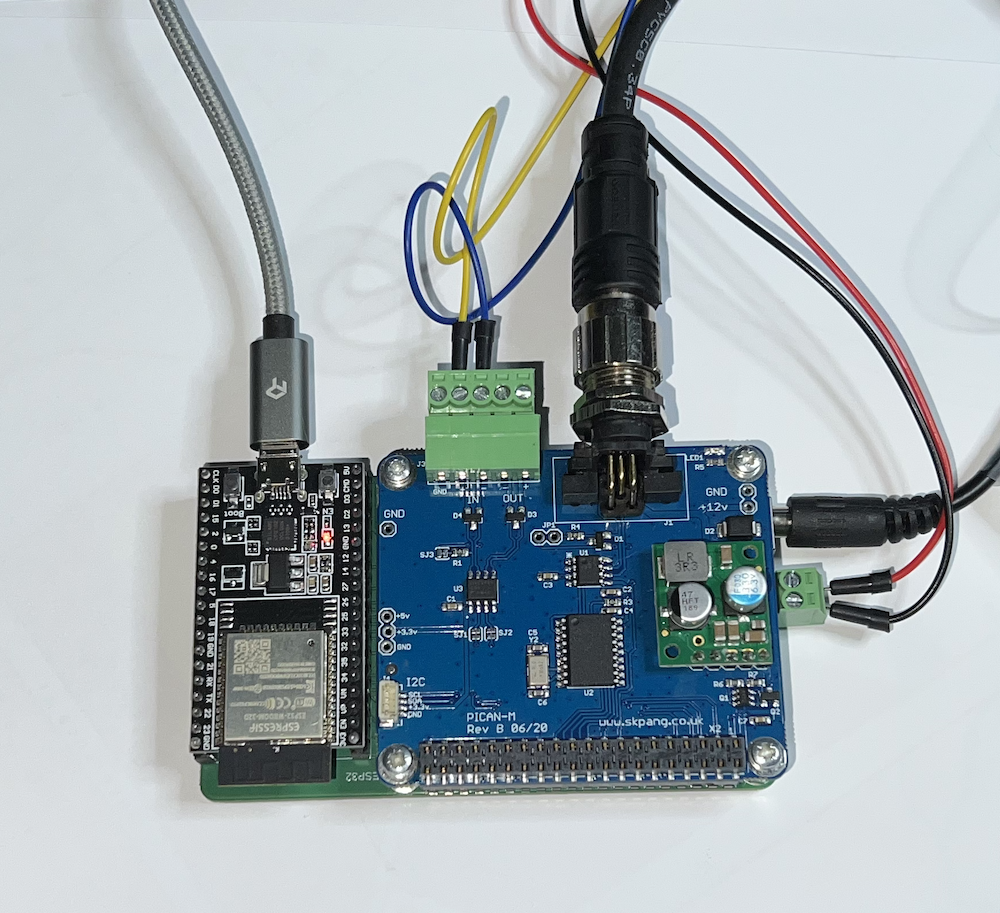
In this post I will describe the communication between the espBerry board with the integrated PICAN-M HAT. Due to the nature of the HAT, there are two sections: 1. The NMEA 0183 port and sketch and 2. the NMEA 2000 port and sketch.
NMEA 0183 Connection & Sketch
The PICAN-M HAT converts the NMEA 0183 signal to TTL (UART), which connects to the ESP32 Tx and RX signals as demonstrated in below image:
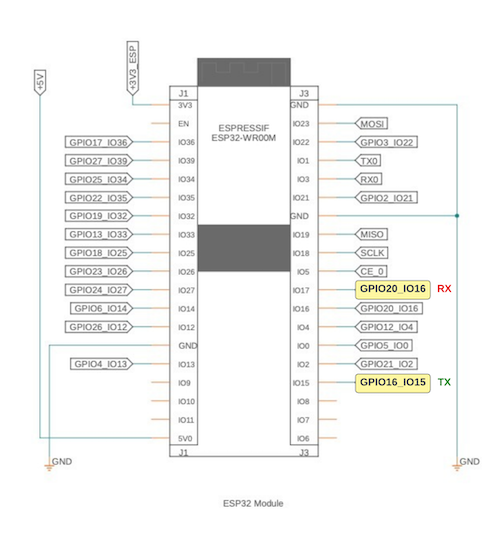
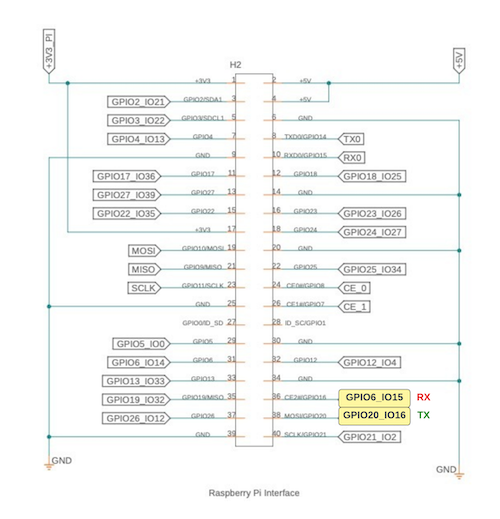
In the Arduino sketch, I assigned IO15 as Rx and IO16 as Tx, which are connected to GPIO16 and GPIO20 on the 40-pin header.
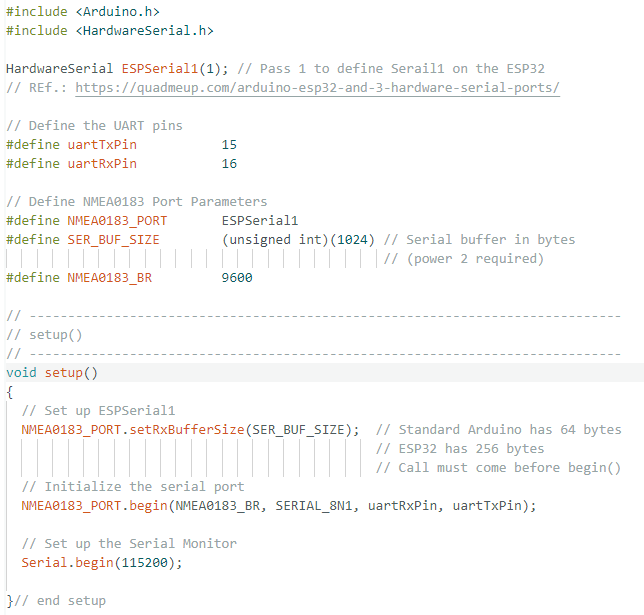
However, when working with the ESP32 under the Arduino IDE, you will notice that the Serial command works just fine but Serial1 and Serial2 do not. The ESP32 has three hardware serial ports that can be mapped to almost any pin. In order to get Serial1 and Serial2 to work, you need to involve the HardwareSerial class. As a reference, see ESP32. Arduino and 3 Hardware Serial Ports.
Consequently the setup looks like:
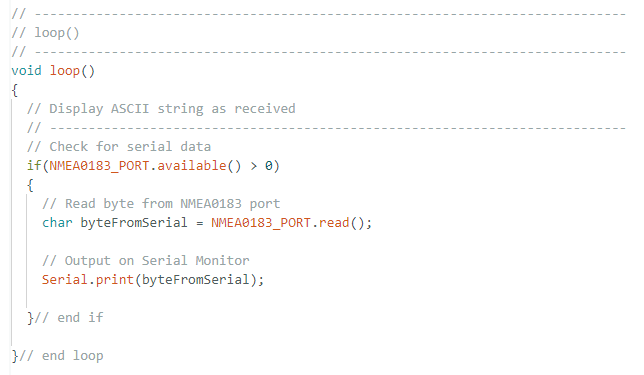
Over all, the sketch I wrote is ridiculously simple. It reads the serial data received through the NMEA 0183 port and passes it over to the Arduino IDE Serial Monitor:
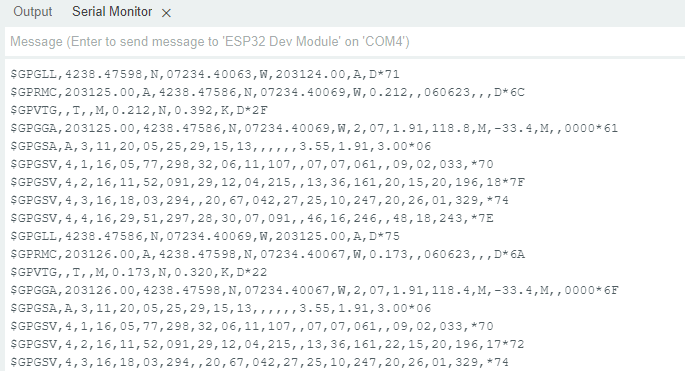
For my tests, I connected a GPS device to the PICAN-M board. The output on the Serial Monitor looks like this:
For more information on NMEA 0183, see:
- NMEA 0183 (Wikipedia)...
- NMEA 0183 Interface Standard (NMEA.org)...
- Everything you need to know about NMEA 0183 (PDF)...
- NMEA 0183 Installation And Operating Guidelines (PDF)...
- The NMEA 0183 Protocol (PDF)...
NMEA 2000 Connection & Sketch
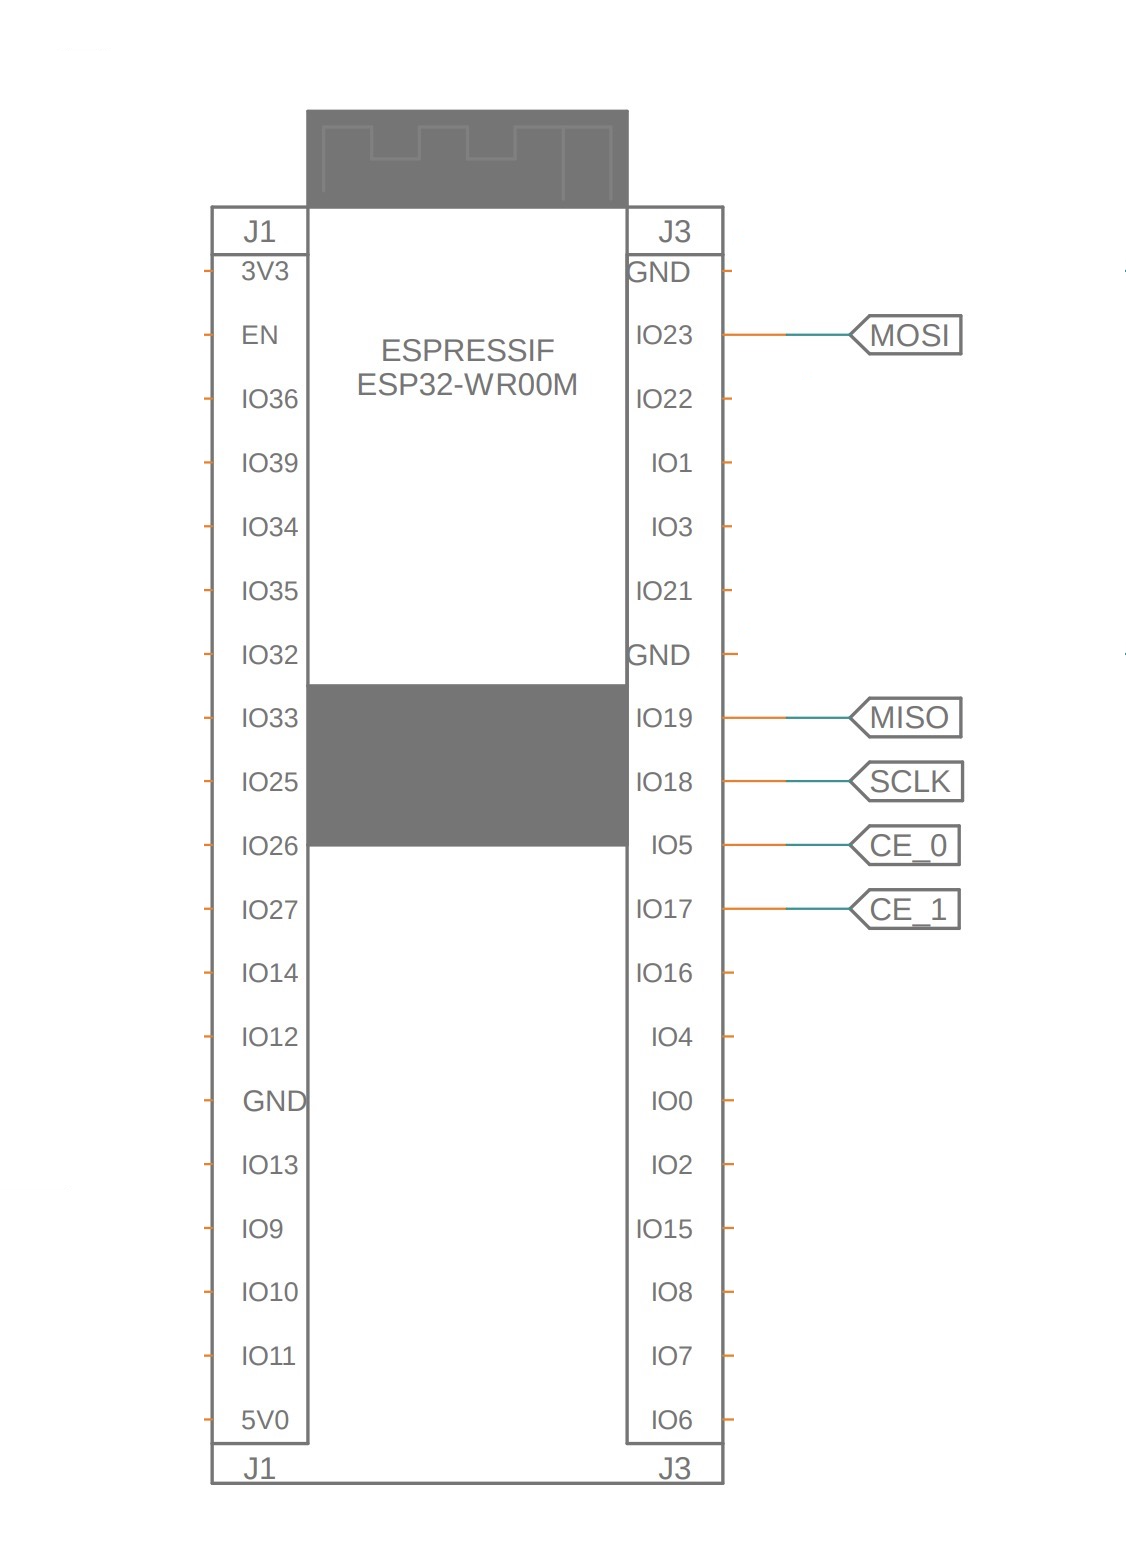
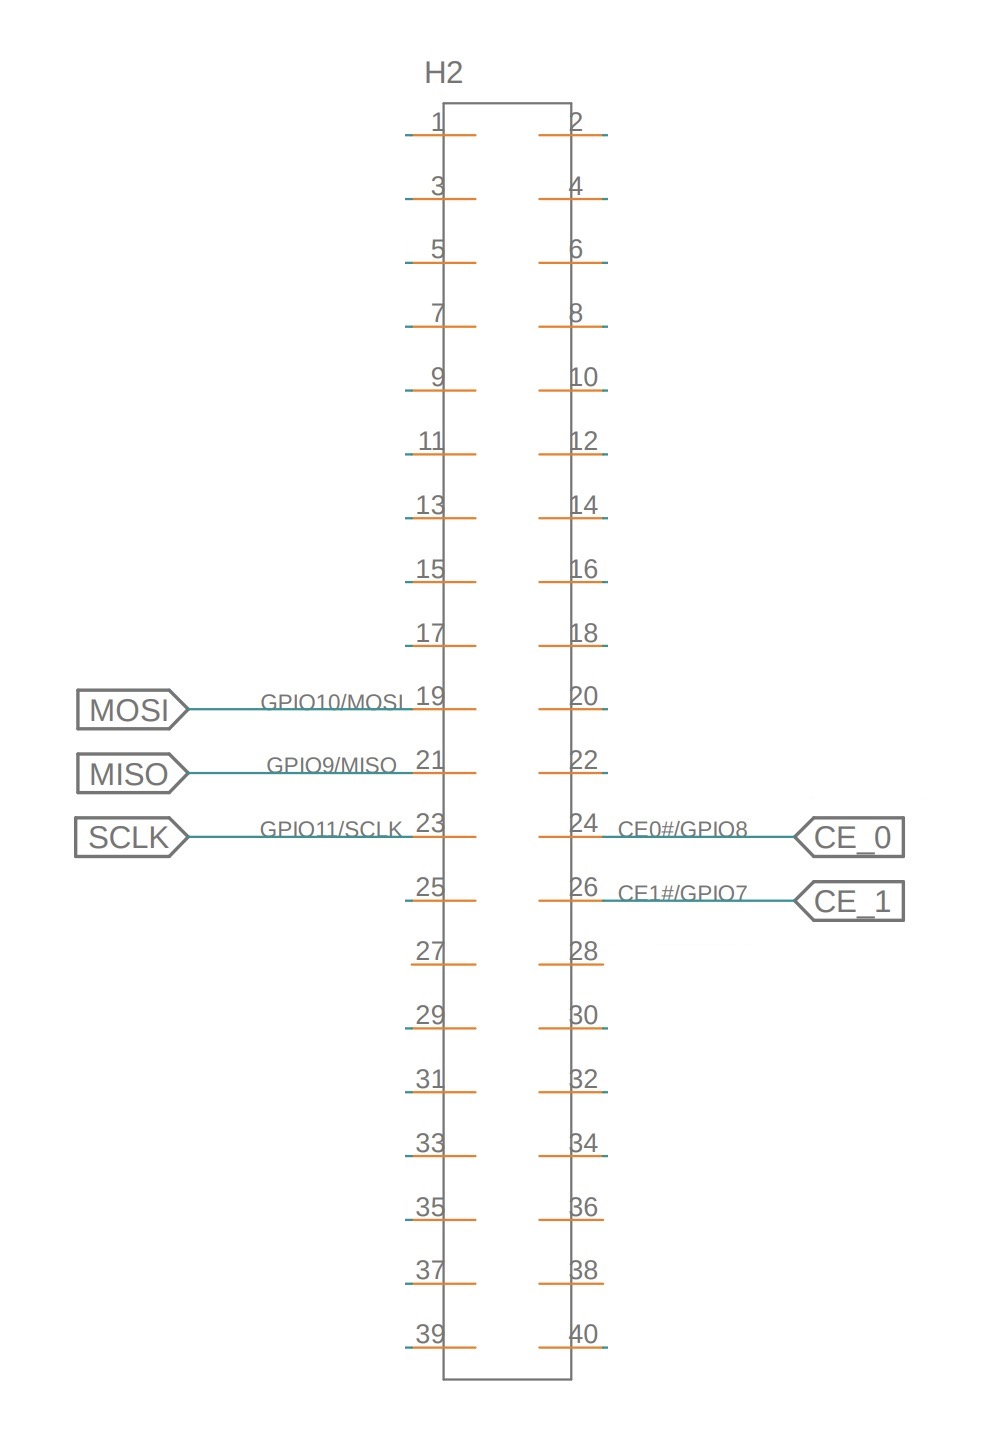
The PICAN-M HAT utilizes the MCP2515 CAN Controller, and it is controlled per SPI (Serial Peripheral Interface), and we are using the Standard ESP32 and RaspberryPi GPIO signals for the espBerry:
For the programming, I use the Arduino IDE with a sketch: MCP2515 software by Cory Fowler as available through github.com. The code applies to any Arduino board plus MCP2515 shield. There is also an example for accessing two MCP2515 ports.
If you are an experienced programmer, you will be fine with the code from github (as referenced above). I have, however, modified the code slightly to make it work "out-of-the-box."
Click here to download the code.
In the ESP32_MCP2515.ino file, adjust the following line to adjust to the PICAN-M board:

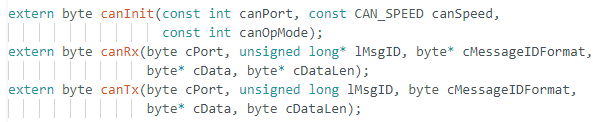
I wrote a "wrapper" around the github code, mostly for improved readability and use. The available functions are:
The code transmits a CAN data frame every one second, and display any received CAN message.
To test the program, you will need another CAN node to establish a network. As usual, for any professional CAN Bus development I recommend the PEAK PCAN-USB Pro. It's well worth the investment.
 Electronics Projects with the ESP8266 and ESP32: Building Web Pages, Applications, and WiFi Enabled Devices
Copperhill Technologies highly recommends using this book for your wireless application projects. Yes, many good books and free online resources are available these days, but this is the book we are using. It made our approach to Bluetooth, BLE, and WIFI a breeze. Programming wireless applications without hassles was fun, and we will share them on this web page.
Projects throughout the book utilize the wireless functionality and processing power of the ESP microcontrollers. Projects are built in the Arduino IDE, so you don't need to download other programming software. In addition, mobile apps are now ubiquitous, making the app build projects of the book very relevant, as are the web page design projects.
In Electronics Projects with the ESP8266 and ESP32, you'll see how easy and practical it is to access information over the internet, develop web pages, build mobile apps to remotely control devices with speech recognition, or incorporate Google Maps in a GPS route tracking app.